About a year or so ago my buddy in VT gave me a few lengths of butternut left over from when he cleared out land for his camp. I do love butternut for it's appearance, ease to work with and how light it is. Using one I made one over the course of a year, a five foot paddle all one piece, yeah I like one piece for making a paddle. My only concern was at only one and a quarter thick I didn't have much to work with and as I feared the shaft came out thin, it was oval instead of nearly round. If only I had two inches to work with but it wasn't happening. Regardless this paddle has a lot of spring to it and the blade being two feet long but only four inches wide I can get a lot of power out of it. I really wanted something in the Northwest style but in these rocky New England streams a pointy end wouldn't work so I kept it in almost a square end coating the final two inches with two layers of G-Flex to fight off the rocks and sandy bottoms of the rivers.
If you wonder why only a four inch wide blade I kept in mind my poling experience. Stick a one inch pole four feet into the water and pull and it will rocket you forward. I'm sure there is a mathematical equation for this type of thought but I'm not gonna figure it out cause I've done it and it works. What I was a bit disappointed in was that a five feet I thought it would be long enough for my short stature to be able to use as a stand up paddle. Nawww, just short enough to make it a pain in the ass, or actually back!
 |
| 5' tall with the blade 24" tall by 4" wide |
So I have been wanting to make another and thought I was out of Butternut but after sorting through my wood pile I found a seven footer! Yeehaw! Once again a thin cut at just over one inch but there is enough wood there that after I cut out the blank I cut up the leftover pieces to add to the shaft so I will have a thicker stock to work with.
After planning it I had just over an inch to work with but this paddle is going to be seven feet in length, I ain't messing around this time! I traced out the old paddle shape on it and then added two feet to the shaft and started cutting with my antique Craftsman sabre saw! Talk about slow work but that is what I need to do, slow and steady!
 |
| One long ass cut to the top |
 |
| The shoulders cut out |
 |
| I added lines outside the originals |
More To Come.
January 13, 2013
I finished cutting out the blank last week and have been mulling over what to do about the thin shaft. I know I want it thicker but what I have for left over stock is not as long as I want. Damn, always works out that way! Well, after looking it over I am pretty convinced that I went overboard at making it seven feet but am going to keep it that way for now. I decided to cut one of the leftovers in half and glue the two pieces on to each side of the shaft. This will add approximately 3/4's of an inch more to play with when it comes time to sand it to as near round as I can get.
 |
| Three rough pieces |
I laid a layer of GF on both sides and clamped the slivers on and am now waiting for it to cure. My thought is to slowly round it over and taper the ends to meet the shaft as at the grip I will make it thinner as most of my other paddles are like that. I brought all of them out and looked them over first before I did this step!
 |
| Clamps in place, ended up using 10 |
 |
| The extras add up to roughly 3/4's of an inch |
As for the length I do think that it is overkill for a guy of my grand stature, a mere 5'9" and shrinking. I will have to test it before I make my decision but if push comes to shove I will cut it down and marry the grip with the shaft with a dowel and some more GF as I have done that in the past. As it is now I will have to strap it into my boat(s) to transport it as it won't fit in my car! I am also debating what type of handle to make. One part of me says a T but I'm not over fond of that so may go for a more traditional approach. The waiting game is on...let it dry and then start the fun task of sanding!
More To Come.
January 19, 2013
Slowing I have been working on this paddle doing what is the ugliest job and that would be sanding. In the gentler months I do this outside but with the winter here I do it inside and it makes a real mess. Regardless and despite the fact that I won't be able to test it for at least another month I'm going full bore on getting it down to where I want it.
 | |
| Ready for Sanding |
 |
| Trying to shape the shoulders |
As I mentioned I glued some extra wood on to make a round and I guess I did not pay enough attention to the grain as after the resin set and I started sanding the glued on piece peeled off instead of sanding clean. After a quick session of calling myself DUMBASS and many other names I decided on leaving it and calling it a battle scar and hope that the varnish I plan on using will cover it.
 |
| What happens when one is lazy with details, wood grain! |
I got the blade almost to the point where I want it and now will hand sand it to get the finished look I want. I still have the grip to deal with and the shaft needs some more sanding. At the throat near the shoulders is roughly 1 and 1/4" in diameter and after running by measuring tool up the shaft it gets to almost 1 and 3/4" as it nears the grip. Despite that I have some reservations about taking too much more off. I have flex in the entire paddle, it's almost round in the shaft and weighs in at 1.85 pounds, not bad for a seven foot paddle!
The tools I have used to date are a belt sander, a finish sander and just plain sandpaper by hand, for sandpaper I am using used belt sander belt and moving up to 400 grit for finish sanding. I rough things out with the belt sander and then use the finish sander to shape even more. I prefer to use my hands for the real finish work as I can feel the where I need to work more with my fingers under the sandpaper! It really is frustrating and satisfying at the same time!
 |
| Two Sanders and leftover belt sander paper, save all that stuff. |
Here's a pic of two of the paddles that I like to use due to their length next to the new one, I have plenty of short paddles.
 | ||
| Left to right: Butternut @ 60", middle 69" Pine, right7 FREAKING FEET! |
More To Come.
January 20, 2013
I did a bunch more sanding this morning and decided it was as good as I was going to get it. Hell, I'm not pro here and the damned thing is mine so I only have to stand up to my expectations! Good is good!
I decided to weigh it again and came out with 1.6 pounds and I still have the grip as raw stock. Not bad and the flex is more than acceptable to me. I spent some time farting around with the grip on my other butternut paddle and decided what I really need is to add more meat to the mixture for sanding down to where I want the grip to look like and feel comfortable to me. I had some leftover butternut and cut it down to two strips that I wanted to glue on.
For this part I used G-Flex as the binder and just clamped it all up. The waiting/drying game is in play and the next and most difficult part of this whole project is coming along, deciding the shape of the grip!
 |
| Raw Materials |
 |
| Everything Laid Out |
 |
| Clamped Up, Hope it's thick Enough |
More To Come.
January 26, 2013
After a week of freezing ass winds and temps I finally got a chance to work on the grip of this paddle. I had been hemhawing about the shape I wanted to make it and decided on the ones that are on my Mitchell paddles. I was going to cut them out but at the last minute thought my best choice was the belt sander followed up by hand sanding until I got it to where it felt good in my hands.

The Mitchell Voyageur is a sweet paddle and I love using it, just feels good and is light. I started with the sander and just did a small section at a time. I knew this wasn't going to come out as good but I wanted to get pretty damn close.
 | |
| Traced out and a slow job of shaping |
 |
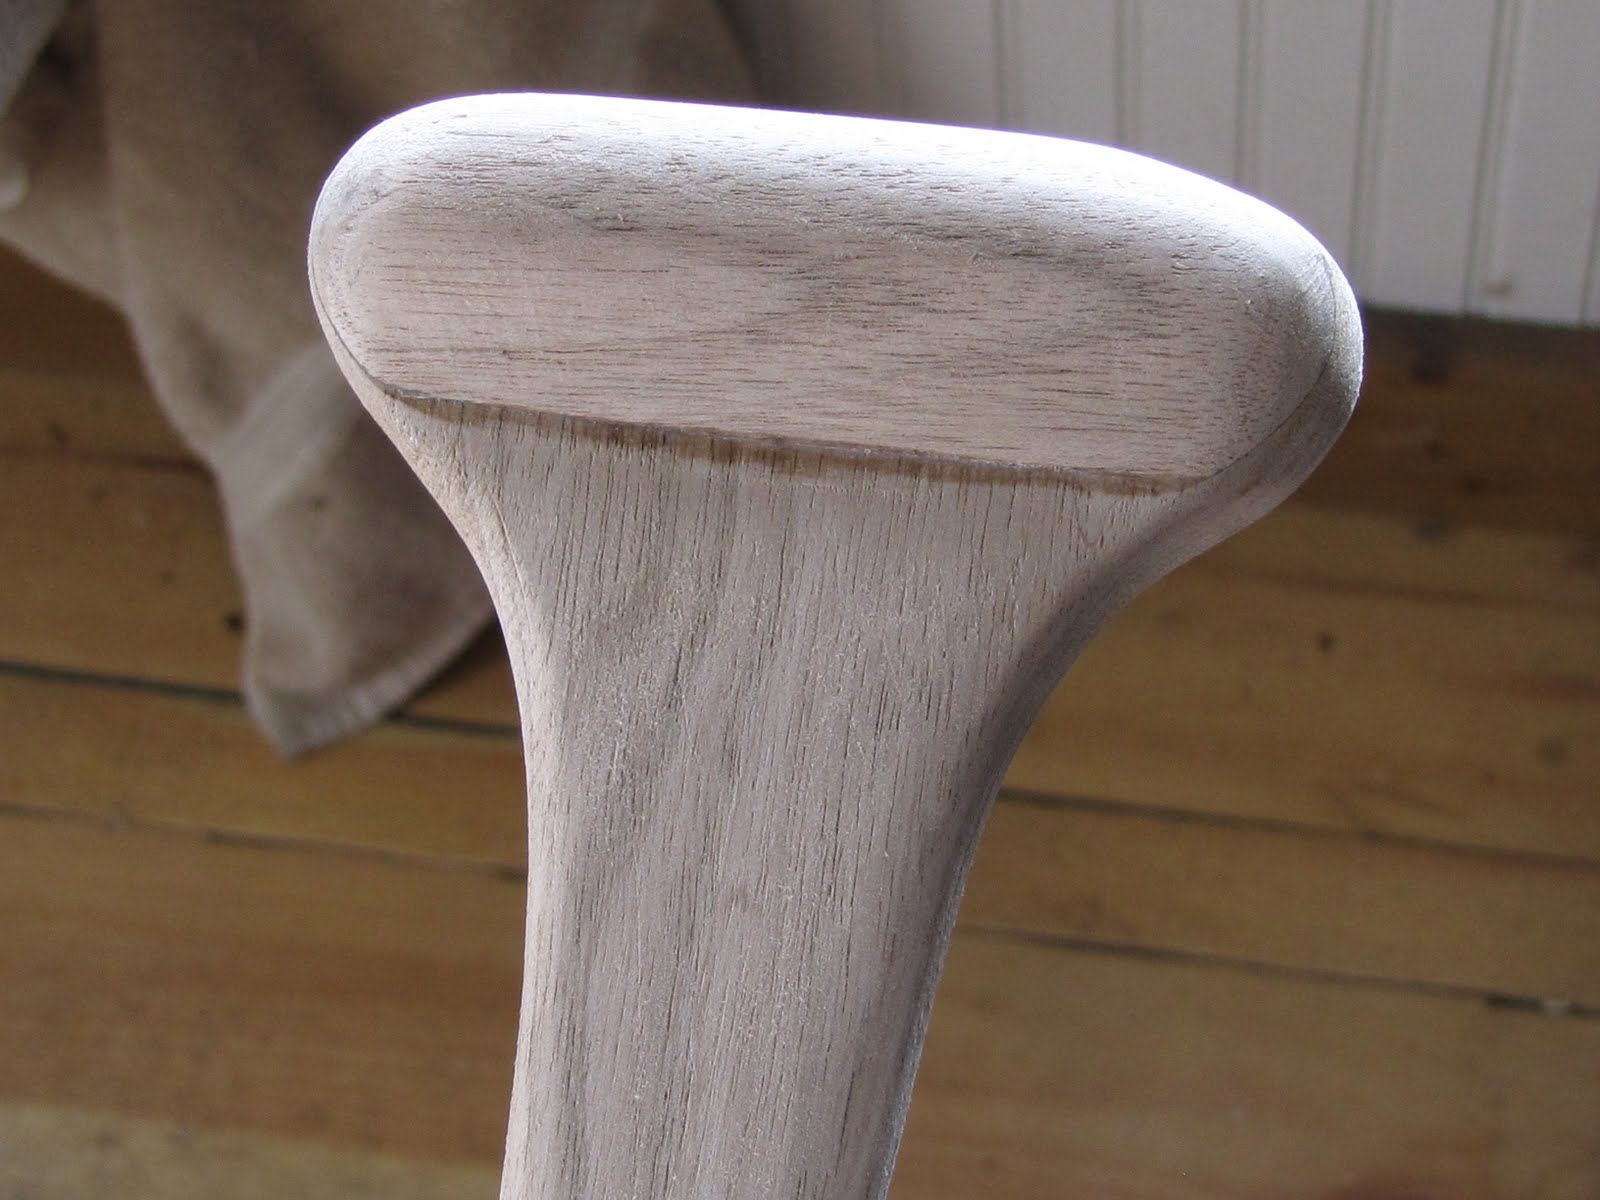
| Kinda looks like the goodin' |
 |
| Knocked down the add on's |
 |
| Rounded the grip some more |
 |
| Thinned out the shaft some |
I got it roughed out to the point where I wasn't going to use the belt sander anymore and just started hand sanding. I used a mixture of different grades of paper and got it to a point where I need to step back and think it over. Mostly just hold onto it to see where I need to take a hair more off. By now the winds had decided to kick off and the temps dropped and my fingers were starting to get that solid ice feeling so I gave it break.


Oh yeah, more sanding to some but I'm liking it more and more. Also, it now weighs in at 1.7 pounds according to the mail scale. Not bad!
A Quick Intermission Here. I was up early the other morning and started a search on grip shapes before I started and came across a website that just blew me away. This guy was building hollow shaft paddles with a bent blade! HOLLOW SHAFT PADDLES! I must have read that write up about a dozen times and had more coffee than I needed. His other writings are great as well. I added his webpage to the list but wanted to put it here as well. Sucks that he lives in Texas and I'm here in NH cause I'd love to spend time watching him build some of the stuff he's posted.
http://ngc704.home.comcast.net/~ngc704/Home%20Page/
More To Come.
January 27, 2013
Another cold and windy day so off to the shed to sand some more on the grip. No pictures as sanding is like watching the tide come in and out! Finally got the shaft down to where my hand felt really good on it and the "bulb" was as comfortable as well. I might want to tweak that in its length down the road but I really need to try this out first. If there is open water somewhere I might give it a try this coming week.
Now on the bottom of the blade my thoughts are to sand a one inch band across the width on both sides and fill with G-Flex, on my other Butternut paddle I just slathered it on and it worked great but I hate the looks of it. It has been suggested that I lay some carbon fiber cloth, I have a bit, but I don't think I will make the shallow bends in the blade gracefully enough to make it look good. I do have a touch of pride in workmanship and have learned from past mistakes! If I sand down a bit and lay a thin coat to meet the rest of the blade it'll be a nice barrier for what I know will happen in these New England rivers, rocks, sand, more rocks and more sand. I am hesitant to sand it down further though. Some more looking it over is on the books before I do anything. Nothing like a Charlie Brown winter clad dub like me standing around looking at a hunk o' wood trying to figure out the next move. Hell, even my cans of liquid courage are turning into slush, maybe I should just pour them into a mold and make Popsicles! Closing in on putting on the final layer!
More To Come.
February 2, 2013
Happy GroundHog Day! I put into motion my plan to sand down the end of the paddle to make room for a layer of G-Flex to protect the tip of the blade. Since the blade was pretty thin I opted to use a block sander and go by hand. Here is how I set it up, very simple and efficent:
 |
| Jury Rigged Block Sander |
 |
| This Worked Great |
I started with an old belt sander but it was too course and I didn't trust it so I switched over to this stuff and it worked great! By using the block I was able to get the edge in the tip I wanted. I have been mulling this over since I started this paddle and kept saying NO, then YES. I looked at my other Butternut paddle which I had just slopped the G-Flex on and didn't like the looks. Taking my time I got the tip down and had a lip on the blade so am hoping that the two will meet gracefully and look ok.
I used a clamp and a combination square to get my line in place, about three quarters of an inch, I don't think I need much more, it encompasses the rounds of the tip of the blade and the bottom which I think will work.
 |
| Jury Rigged but Seems to Work |
 |
| Another View |
Here's what it look like:
 |
| Carved Down |
 |
| Side View |
 |
| Resin Dam! |
 |
| Resin In Place |
So now it is the ol' waiting game for the resin to cure in cold weather. It will be interesting to see how well the paper peels off the G-Flex and how much made it the actual tip of the blade. Once this is set I still need to do the other side.
More To Come.
February 5, 2013
The first layer came out ok! What I thought might happen did but there wasn't much I could do about it, the G-Flex bleed into the blade a little bit but when I apply the spar varnish it should, hopefully, hide that as this wood turns a nice brown color when it's applied. This morning I did the other side using the same process but it was colder out and I had a difficult time spreading out the resin. In the end I got it onto areas I wish I hadn't but again the spar should hide it. I'm waiting for the resin to harden and by tomorrow I can start with the five layers of varnish I want to apply. The only bitch is that there is no open water to try this damned thing out on!
More To Come.
February 5, 2013
With the resin hardened I started the first of five coats of spar varnish. I was amazed at how the wood really sucked it in. It worked out to be a very thin layer which was ok with me. Over the next four days I plan on applying a coat a night and letting it dry. I use 0000 steel wool in between each coat which makes for a super smooth finish in my opinion. I am doing this in the warmth of my house as the better half doesn't mind. Hell, she likes the smell of gas so a little varnish smell doesn't seem to bother her at all!
Butternut turns a very nice color with varnish or oil, a nice rich brown, not to dark nor to light and the highlights of the grain really stand out. Of course this shows every mistake I've made but like fixing canoes it is the learning curve!
Pictures to come when done.
More To Come.
February 13, 2013
After five coats of varnish I am calling it done deal on this paddle. The grip feels good in my hand, it is light weighing in at 1.68 pounds on the mail scale and it looks good to my eye. Thinking of the last butternut paddle I made I think will work just fine and after talking some paddling buddies who have tall paddles I think that at seven feet I won't follow the same fate as they. They all still have to stoop over when standing! My goal was not to do that and although I still need to try it out I think I will be satisfied with it. Goddamn, I am such a freaking worry-wart when I'm working these type of projects! As I mentioned the wood becomes a beautiful rich brown, a very handsome color. I am quite pleased.
A few pics of the finished paddle:
 |
| All Seven Feet On Display |
 |
| Nice Long Blade |
 |
| The Grip Feels Good |

This last picture has it leaned up against the 4 wheel drive truck to give an idea of how tall it really is. All in all a good project and am hoping it will work out well. Sometimes a pole is great to use but I have often thought how nice it would be to have a narrow long paddle as well. Calling this a done deal so there is no More To Come.