July 24, 2011
I'm not quite sure why I did this but I found another canoe on Craigslist and I just couldn't help myself. While talking to the owner he said that it was about 15 years old and the last winter it got cold cracks in it in several places. Of course I neglected to ask what model it was but being a Mad River I decided to go for it. After rebuilding the Courier I am confident I can tackle a few cracks in the hull.
I make the drive north and to my surprise find a canoe in very good shape! I looked the cold cracks over and decided that they would be an easy fix. The gunwales though are dry rotted out and will need to be replaced but I have a set of vinyl gunwales that should fit. I paid the cash and racked it and headed home.
Double click on the picture above for the specs on this canoe and then get out your reading glasses cause the print it small.
 |
| Respectable looking canoe! |
|
 |
| I need to get the HIN off it yet |
 |
| I'll probably add web seats as the cane look brittle |
 |
| A tad dried out |
 |
More dried out wood
|
The first step will be to clean the hull and then remove the gunwales to see what I'm up against. I do want to take it out on the river to see how it handles before I start the rebuild. It will be interesting to see the difference between the Malecite and this. I do like the Malecite due to being 36" wide and this is only 33" but shorter by, hmm, 5".
More to Come!
July 27, 2011
I hadn't planned on working on the boat but at the last minute got into it. First I took off the deck plates and man were they rotten. I took a hunk o' sandpaper to it and it looked like a pile of sawdust from termites. Any thought of using them besides a template was a foregone conclusion. I looked over the gunwales underneath the plates and stuck an awl in there and it just sunk in. Another bummer but expected.
 |
| A nice layer of crud on the underside |
 |
| Very Rotten Gunwales |
The next step was to drill some holes in the cold cracks and that went pretty well. I used the same size drill bit as I did on the Courier. There was a lot of dirt on the hull so I dragged it out of the shed into the light and wiped it down and low and behold I found more cracks. I knew it was time! Bath Time!
I broke out the hose, a bucket and the scrubby and started cleaning up the hull inside and out. A half hour later I had a good look at the hull and the cracks. There are nine cracks in all, some where hidden by a layer of dirt. This is a good lesson to really clean the hull before you get started.
 |
| Cleaned up outside... |
 |
| and inside. I did cheat with these pics, the hull has just been hosed down |
This hull must of been part of a painting party for there were lots of paint deposits on it. No big deal, they came right off with a little elbow grease. There were also black streaks from rubbing up against something, maybe a tire? Those came off with a little more scrubbing and goddamn if the hull didn't look almost new except the expected scratches from use.
 |
| Holes drilled at the bottom of the cracks |
 |
| The worst of the crack |
After cleaning I found 9 cracks in all. Four of them had some length but all fixable. Several were small. After the wash and scrub I'll be ready to take off the gunwales and start the repairs.
I finally got the HIN but it is either worn a bit or wasn't stamped in deep enough. I could get most of it but the bottom line this hull is a 1993 so it's a 18 year old hull that has been treated good and looks better for it's age than it should and a few years younger then the Courier.
More to Come.
July 28, 2011
Experimentation Day!
I wanted to get one crack filled with G-Flex today and see how I was going to make this all happen. The Courier was unique and needed some special attention and I learned a lot so it's time to apply some of those lessons to this project.
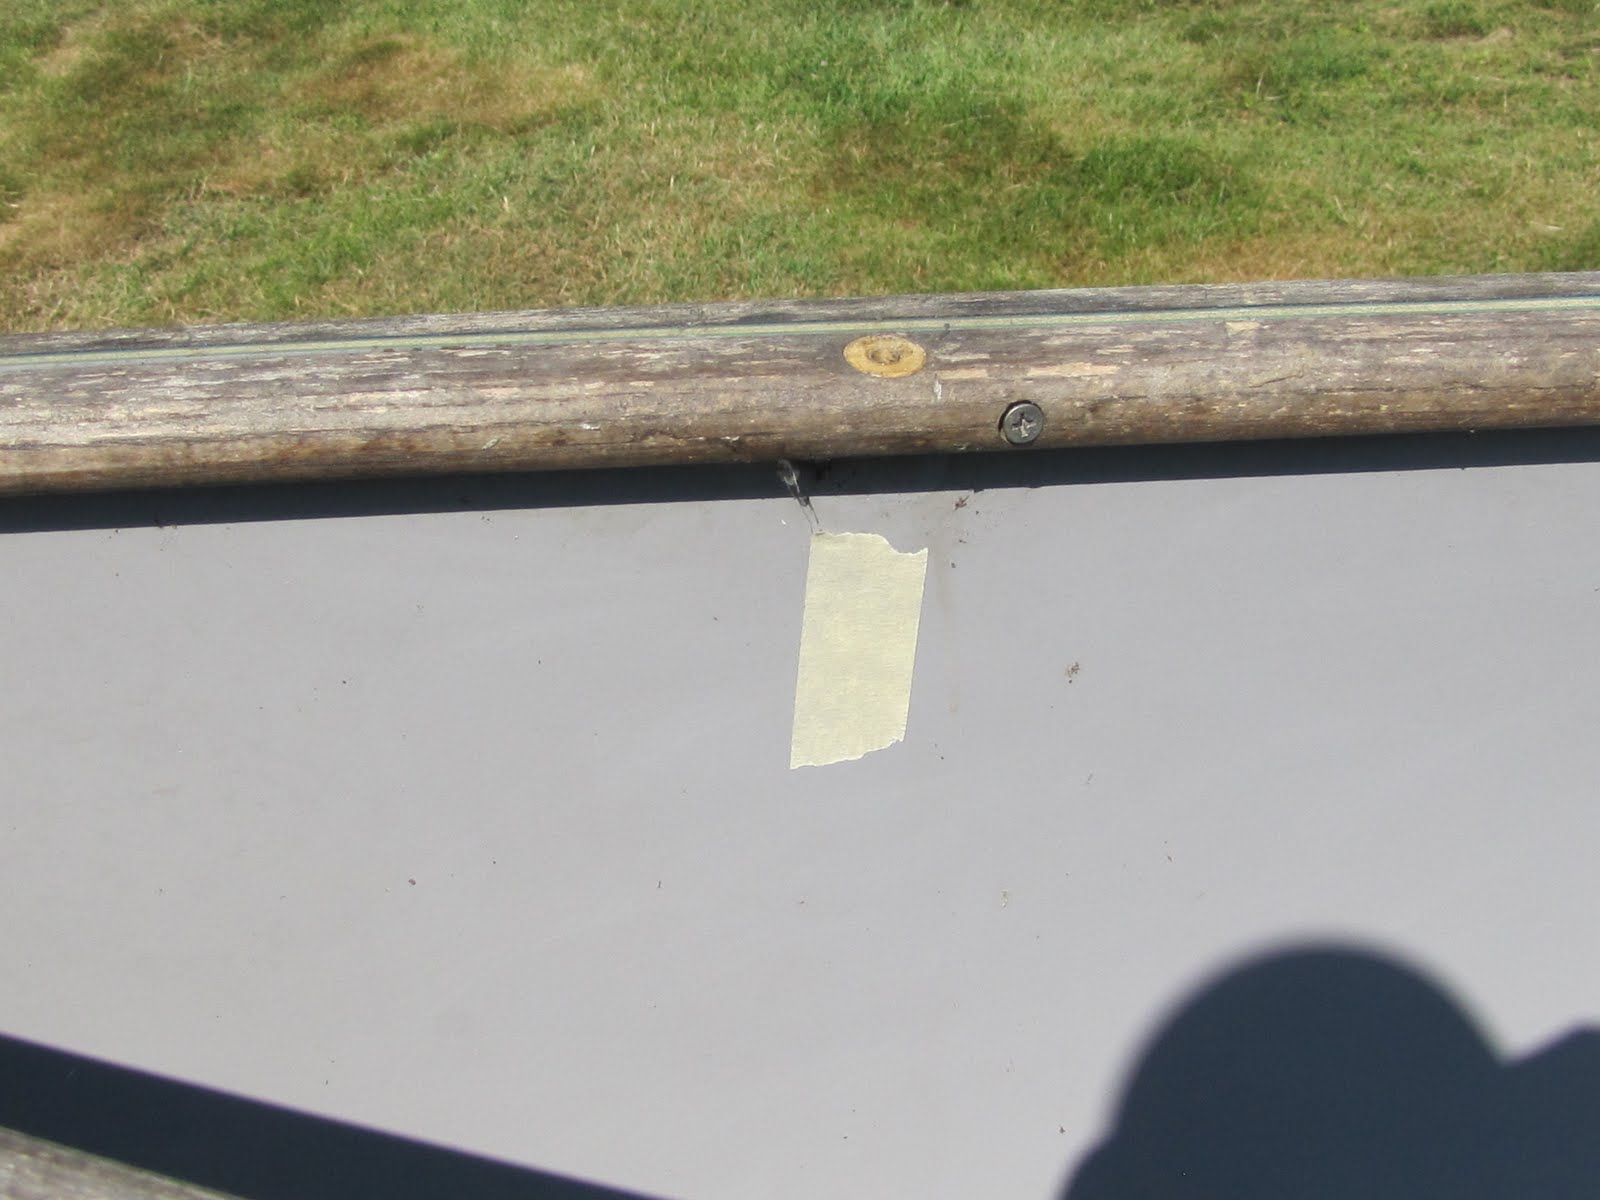
The very first thing I did was to mark all of the placements for the carry handles, seats and thwarts with tape for the future. I then took all of the screws out from the bow to the seat. For some reason I think I want to weasel the gunwales around while keeping them on the hull. I was waiting for the rotten wood to break off but there seems be a tad bit of life left in them and it went better then I thought it would. Now this may be unorthodox in method but I figured I didn't have much to lose trying it this way. I kept checking to see if the crack was going to uneven in anyway with the wood on but with that much space it was all good.
Now I might have a smart idea of bagging all of the screws with labeled bags and then to avoid losing them like I have in the past I am storing them with the F-You/Dipshit Gloves! Should work until I move them again!
 |
| Gunwales unleashed |
 |
| Sawing down the Crack |
After I got that part done I taped the inside of the crack and then applied resin in to the crack using my previous method of dribbling it in a little at a time. It took three passes with the resin to fill in the crack and holes as I made small batches. It did suck to cut through the decal! I waited in between passes so the resin could set up a tad and then added more until everything was filled nicely. Sweet!
July 29, 2011
With the threat of rain I decided to go for another crack. This one I cut a tad wider then the previous one and when I drizzled in my resin it filled much better and was easier to move around. Lesson learned. On the Courier I only had one crack to fill and it was pretty damn well established. Also, this time around I kept reciting my new mantra, "Small batches of resin Grasshopper, small batches!" I didn't waste one drop of it and had nothing to add to my resin log!
The usual taping, wax paper, more taping and a wait until tomorrow will bring me one crack closer to being done. It is a relief to know this job will be such a short and fairly easy one and will hopefully be taking a test ride next week! That Goddamn Courier damn near killed me!
More to Come!
August 6, 2011
Finally got to work some more on the canoe. The ol' Honey Do List managed to get in the way. Now here is the strange thing that happened on the last batch of resin applying. I drizzled my resin in like I have been doing but when I went back later the cracks had large gaps where the resin seemed to have disappeared! It happened on both of the cracks and I ended up putting more resin in to make it a solid bond.
This got me wondering and I called the Guru and we discussed it some. The only thing that we could come up with was that the foam core was mighty thirsty and was sucking in the resin. I don't know if that is a good thing or a bad thing but it happened.
Today I ended up using my hack saw blade and widened two of the cracks and this time, I did neglect this on the previous cracks, stuffed some sandpaper in and smoothed all the edges and burrs off from the cut. I was working with three cracks with the middle one being fairly long. Sorry, no pics this time around due to lack of batteries. I clamped it at the top and worked on the two outside cracks.
The first crack was short and the resin seemed to be ok but I waited it out for about an hour before returning and found the same results, gaps as if the resin had been soaked into the foam. I applied another layer and waited and damn if it didn't come out ok. On the second crack I tried to use a small paint brush to lay a thin coat into and over the crack but the resin was thick enough that the brush became useless and I had to clean the whole thing and start over. Good idea but didn't work that well.
I did resort back to my popsicle stick and toothpick method of getting the resin in the crack but it was several applications to make a good bond.
This truly has me stumped. I don't know if it is the build of the boat, the age of the boat, the foam core? Who the hell knows?
So what I thought would be a short job is now turning into a longer job. Only 5 more cracks to patch but that Goddamn Honey Do List is a pain in my backside and is holding me up from getting this hull on the water!
More to Come.
August 8, 2011
Yesterday I cut the middle long crack out with my hack saw blade but the humidity was rugged and after cutting, splitting and piling wood for the winter I was wasted and called it a day. After work today I cleaned the crack and taped the inside up, added a couple of layers of tape on the outside just a hair away from the gap and started drizzling my resin. Goddamn, same thing! It kept disappearing into the dark hole! Is that damn thing a dark star with freaking gravitational pull?
Now I was getting pissed so I mixed up a bigger batch of resin and really started laying it in thick, I was careful not to start throwing tools this time, I'm still looking for my small screwdriver! I took my time using my high tech toothpick to run it up and down and in and out. Christ, this is starting to sound like a porn story but I sure as shit wasn't getting off on it! Regardless it seemed to work. I put enough in so it was full to the top of the crack and then let it sit for about 20 minutes and came back after a can of liquid courage. My thoughts were if all the resin had soaked in I would have to switch to a bottle of 80 proof liquid courage! Nope, all was good and thank god cause my liver worked over time on the Courier! I laid down some wax paper, yeah Mr. McCrea I do have to get some of that plastic film to try, and taped it down working the resin with my finger nail. With the humidity we have now I'm going to wait a good 24 hours for this to set up and see how the results are. Considering the thirst of these cracks I will probably have to order more G-Flex!
Ok, later in the night, I admit patience is not one of my virtues, I peeled off a section of the tape and wax paper to find a section of the crack had a void in it. Damn, in my minds eye it must mean that the core is dry enough to want to suck in the resin. I can fill the gaps tomorrow but am now planning on laying down a patch of cloth on the inside of the hull on the longer cracks at least. I'll have to look it all over again in the light of day and make a determination on that one but am thinking that is what is going to happen to make a tight bond and not have to worry about it in the future. Damn, just never gets easy does it?
More to Come!
August 9, 2011
Today armed with new batteries for the camera and some new stuff to use instead of wax paper I decided to tackle the voids in the crack...again! Now here is the odd thing. When I peeled off my wax paper and tape patch the crack was filled from the bottom up to just a few inches below the top of the boat. It seems to be a pattern with all of the cracks and once again I'm stumped as to why this would happen.
I mixed up my resin, got my toothpick and popsicle stick out and went at it. I filled it and filled it and filled it poking and prodding the mix and then walked away and measured the new seat placement I wanted on the Courier. When that was done I came back and the level of the resin had dropped some so it was back to filling again.
 |
| Where did the Resin Go? |
I waited again dubbing around with an idea for the ends of the stems on the Courier, yet another project if I decide to go there but that is another story. I came back and finally it was still level. I decided to add a little bit more as the resin was getting thicker and called it good. In my journeys today I picked up a box of these:
 |
| The stuff used for overhead projectors |
I found with the warmer temperatures and the chemical reactions of the resin the wax paper was leaving a residue which didn't happen on the Courier which was worked on in much cooler temps. I cut some strips to fit the cracks and laid it down, smoothed out the resin and then taped it down. I am hoping that it will peel off without a mess. I will have to sand a little to get the wax stuff up when I'm done.
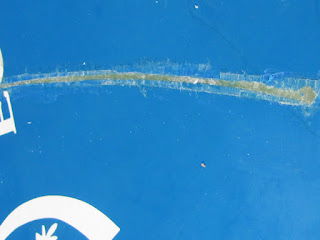 |
| Wax on the edges from the paper I put down. |
It'll be interesting to see what tomorrow brings with this process.
More to Come
August 10, 2011
I checked the patch when I got home and the transparency film stuck to the G-Flex and did nothing but peel off in small chunks. Now that was fun getting it off but I figured the stuff I missed would help protect the crack and said the hell with it. Once again another lesson learned. The school of Hard Knocks can be a hard mistress at times! The crack was finally filled and I only made one error with overflow onto the hull but am going to leave it...for now. I must admit I did a little jig and flipped off the crack just to show it who was really the boss. Damn thing will probably split wide open the first time I get it on the water just as payback!
I have been mulling this over and have decided it is worth the extra effort to lay a strip of cloth on the longer cracks considering what a difficult time it's been to fill them. I am going to look for the cloth that comes in strips and use that but for the other end of the canoe where I have 4 very long cracks I've decided to use the Dynel left over from the Courier project. My thought is to widen those cracks, cover the outside hull with wax paper or maybe plastic wrap and then mix up a batch of West System with G-Flex mixed in and lay the strips of cloth down, let it cure and then any gaps will get filled from the outside. Hmm, time to play with planning this.
Time to flip the canoe around and start to tackle the next set of splits. So much for an easy fix!
More to Come.
August 25, 2011
The Honey Do List VS Canoe Work
Well, I thought for sure this would be a quick fix but the Honey Do List came out ahead. I guess after the Courier rebuild this was warranted and needed. This was not by choice but by endless guilt and needling by the better half to get going on chores. Needless to say I have spent my time working on much needed and required chores so the Eclipse sits in the shed with two sawed out cracks with Dynel cut and ready to put on. Friday promises to be a good weather day and I figure a couple hours worth of work will see at least two of the cracks done. As soon as they cure I can tackle the last two and then it is just one last small one and it will all be good.
I am mulling over gunwale replacements and that will be the next chore but for the maiden voyage I'm going to stick with the gunwales on them as they seem to have enough "beef" left in them to paddle tame waters. Replacing them will be a winter project and decide how and what I'm going to use will be the chore. Hum, decisions, decisions, decisions!
BTW I have cut myself off from CL so I don't find anymore canoes in need of work. I have enough and I'm just plan getting to damn old for this! Yeah, like I'm serious about that!
More to Come.
August 26, 2011
How To Make A Urinal Tablet
Today I decided to get my ass back in gear working on the canoe. Resin Time! I got out my mix and noticed that I was running low on the 206 hardener but went for it anyway. I kept priming the pump and finally got a flow but it was dicey and being the idiot I am decided to add some more cause it just didn't look right. I had the crack all primed and ready to go and slathered the resin in but it wasn't filling like I thought it would. Ok, no big deal! Time for my stand by hero G-Flex. I applied that into the crack and got a good fill and then being that I mixed too much I added it to the other resin.
I had cut a piece of Dynel to lay over the crack and weaseled it into place and then started applying the resin to the cloth. Good deal. I smoothed out the cloth with my fingers and picked up the cup again and Goddamn it was getting hot! Damn, bad mix! Now I have known about this but haven't experienced it yet. I picked up my pace and almost poured it on the cloth and patch and managed to cover it. I put the cup down to smooth the resin out more and when I turned back it was hard and picking up the cup was almost too hot to handle. Holy Shit!
I got my wax paper on and then clamped it as the boat was tilted enough to make the edges uneven and called it good.
 |
| Holding the edges together |
I then turned my attention back to the resin and couldn't believe my eyes. The plastic cup was all curved, sucked in and wrinkled! Man, chemical reactions are quick and intense!
 |
| Took just a few minutes to do this to the cup! |
 |
| One stuck brush |
 |
| Nasty looking thang |
Looking at the cup got me wondering about what it would do to the canoe but it was on and a done deal and I'll find out in the morning how it works. Another lesson learned today, measure the resin right and don't screw around or it'll be a waste and a mess! I am still amazed at the heat it generated!
More to Come.
August 27, 2011
I did a bunch of the Honey Do List this morning and then checked out the patch job I laid down yesterday. As I mentioned I wondering about this as I screwed up the pot mix. I laid the canoe down flat on the racks and started peeling off the tape and newspaper. From the outside I could see that the same old shit was happening, sucked into the core but only at the top! I was expecting this but wasn't surprised. Next I peeled off the inside tape and holy crap the Dynel patch I put on peeled off as well.
 |
| Dammit, didn't stick and looks like a snake skin! |
Damnation, I was pissed! I left it to just cursing and kicking a few things, I had my steel toed boots on thankfully, and didn't throw anything into the field, seems I've lost too many tools that way! Ok, lesson learned here is, as stated in yesterdays post, measure the proper amounts and don't leave it to eyeballing or pumping air bubbles out and calling it good. Just doesn't work. Learn from my mistakes Grasshopper!
So what I'm left with is a semi filled crack at the gunwale line but it did fill in at the bottom and I have to back track once again to get it right. Jeez, this seems to be getting old and am aging to fast. Kind of felt like this:
http://www.youtube.com/watch?v=1okb5EIo1nw
 |
| Gap at the top that still need attention |
 |
| Filled nicely at the bottom |
So now it is back to the planning board. Hell, cold cracks should not be this difficult to fix and this freaking boat should have been in the water a long time ago. I need to buy some more hardener and also some fiber filler to mix in, can't recall what it's called, and then fill those goddamn cracks with that. It truly sucks to be kicked in the ass by a chain of reactions that don't mix when ya want to get the goddamn thing done!
Now, at the request of the guru I laid down some resin, without G-Flex on the the hulk of the hull called the Painted Camper, now cut into 4 sections, and laid a piece of the transparency stuff I got. I left it overnight and it peeled right off with a trace of residue. Go figure. G-Flex must have some kind of bond to that particular type of material that makes it stick. Another lesson learned.
More to Come If I Have the Courage.
Sept 4, 2011
As I get older I find I need less sleep and so I wake at odd hours in the morning. Rather than watch depressing news or stupid ass shows on TV I headed out to the shed and said F this I'm going to lay a patch on that damn crack and seal it. I mixed up some G-Flex and gobbed it on real good and then laid down a strip of S-Glass and using my thumb with my Dipshit gloves on smoothed it out and walked away.
When the sun come up I walked down to see how I fared and I was wasn't disappointed. I did a cobjob, the resin did it's job, it followed gravity and it spread but at this point I decided I really didn't care all that much. It was done! Hell, it is the bow and it'll be hidden by gear, the deck, and if you want to look that hard at a patch job on an old boat then I give ya the number for my shrink cause I'm crazy for working on these old boats!
 |
| Now there is a nice mess! |
I had some chores to do but decided to tackle the second crack that I needed to address. Today is one of those humid days where it feels like water boarding would be a relief! Just walking to the shed was a bear. I felt like a piece of crap from cutting, splitting, and piling 3 more logs for the winter and was a soggy dripping mess. Regardless it was time to get on this and get 'er done!
I mixed up G-Flex and drizzled into the the crack, let it sit, added some more, let it sit, added some more and then laid a wide area around the entire crack. I put the S-Glass on that and using my thumb I smoothed that out and then mixed up another small batch and contributed that. I used my wax paper trick and then clamped the whole crack starting at the top and went down as far as I could with clamps.
 |
| The S-Glass in place. |
 |
| Wax Paper band-aid on and clamped to keep the edges even |
I did use my 4" deep clamp to pull it all together and then checked the crack from both sides and walked away. We'll see how it fares! Three more cracks to go.
More to Come.
September 5, 2011
This morning I tackled the third crack, this being the second longest. Hacksaw blade, 40 grit belt sander belt slid in to smooth the edges over and I got a nice clean crack to work with.
 |
| Clean Crack for Filling |
As I was mixing up my batch of resin I looked into the hull and saw where I had swept all the debris from sawing and thought about conversations about adding filler to the mix as a thickener. Well, I hadn't gotten around to getting to the marina for more 206 hardener and am using G-flex straight.
"Bartender, G-Flex on the rocks straight up please!"
I collected some of that in a cup and got my mix going and added just a little to see what it would do as I dribbled it into the cracks. I had thought it would work its way out but it seemed to be small enough to get into the crack and I figured it couldn't hurt. Us Yankees don't like to waste anything!
 |
| Royalex Shavings |
|
I got the tape in place with the wax paper over it and clamped it all together and walked away. I have one crack left on this side to contend with and am hoping I can get to that today before the rains hit. On the other side is a very short crack that I may just cover with cloth, maybe by Wed!
More to Come
September 8, 2011
I had peeled off all the tape and wax paper the day before and decided it was going to have to be this way for now. The cold cracks were filled and the last one was high enough that I didn't want to deal with it and delay getting this boat on the water. In the end I need to replace the gunwales and do some sanding but summer is running out of time and I want to get some hours and miles on this canoe. The patches on the hull need some sanding for the eye candy look, the cracks at the very tip need another dollop of resin as well but it is all holding together just fine. Done deal in my book.
My plan is to get out Sat a.m. even though the rivers are swollen and racing fast. I am going to do just what I did with the Colander's maiden voyage and that is to take it to the Contoocook where it feeds into the Merrimack and play in that area. If the water levels drop enough I'll go play on the Mack for a bit.
I am going to be very interested in how this hull handles compared to the Malecite. The bow and stern are much thicker due to the royalex vs F/G build but the lines are so similar. The Malecite cuts through the water due to the knife like edge of its build but I tend to think this hull will do just fine.
More to Come.
September 10, 2011
I was up early with one thought in my mind, I needed to paddle the Eclipse. I headed out to a local pond, a man made affair and put in with Sadie Dawg in tow. It was a lazy paddle and I had to jockey back and forth because the Dawg kept shifting yet I was happy with how well the hull tracked.
Back at the house I decided that I really needed a solo paddle with this canoe. I headed out to the confluence of the Contoocook and Merrimack Rivers. The water was pretty high and chocolate brown. I putin and paddled up the Tookie and looked at the spillway on the other sided of the river. I wanted to get in there but headed out into the Merrimack. I kept to the shore and was amazed how well I cut into the heavy current and kept some headway. This boat handles well. Very responsive to the paddle and not as much hull to move around as compared to the Malecite.
Cutting back into the Contoocook I headed upstream again and the dam must have been releasing as the water was higher now and faster. I rounded a bend in the river and could hear the roar of water from the release. Ferrying across the current I got into the second channel and glided between the swap maples and finally back into the Merrimack. For the third time I cut into the Contoocook and took out.
The Eclipse handles very well. I was paddling it from the bow seat as I usually do in symmetrical hulls going solo. She's fast but not as fast as the Malecite, turns about like I expected, you need to think a little bit ahead of time. I am getting used to the Courier and that canoe turns on a dime. I did try getting it on its side but it wasn't having any part of that.
Now, with the ol' back still on the mend I found it pretty easy to hoist this boat up and get it on the car. I need to weigh it as I just don't think what the specs say is true with this hull. My patches on the cold cracks held up just fine although being a bit transparent it was little un-nerving to look at them while hitting a couple of good waves. I do believe this will be my "go to" boat for jaunts down the Merrimack and other similar rivers.
More to Come.
October 6, 2011
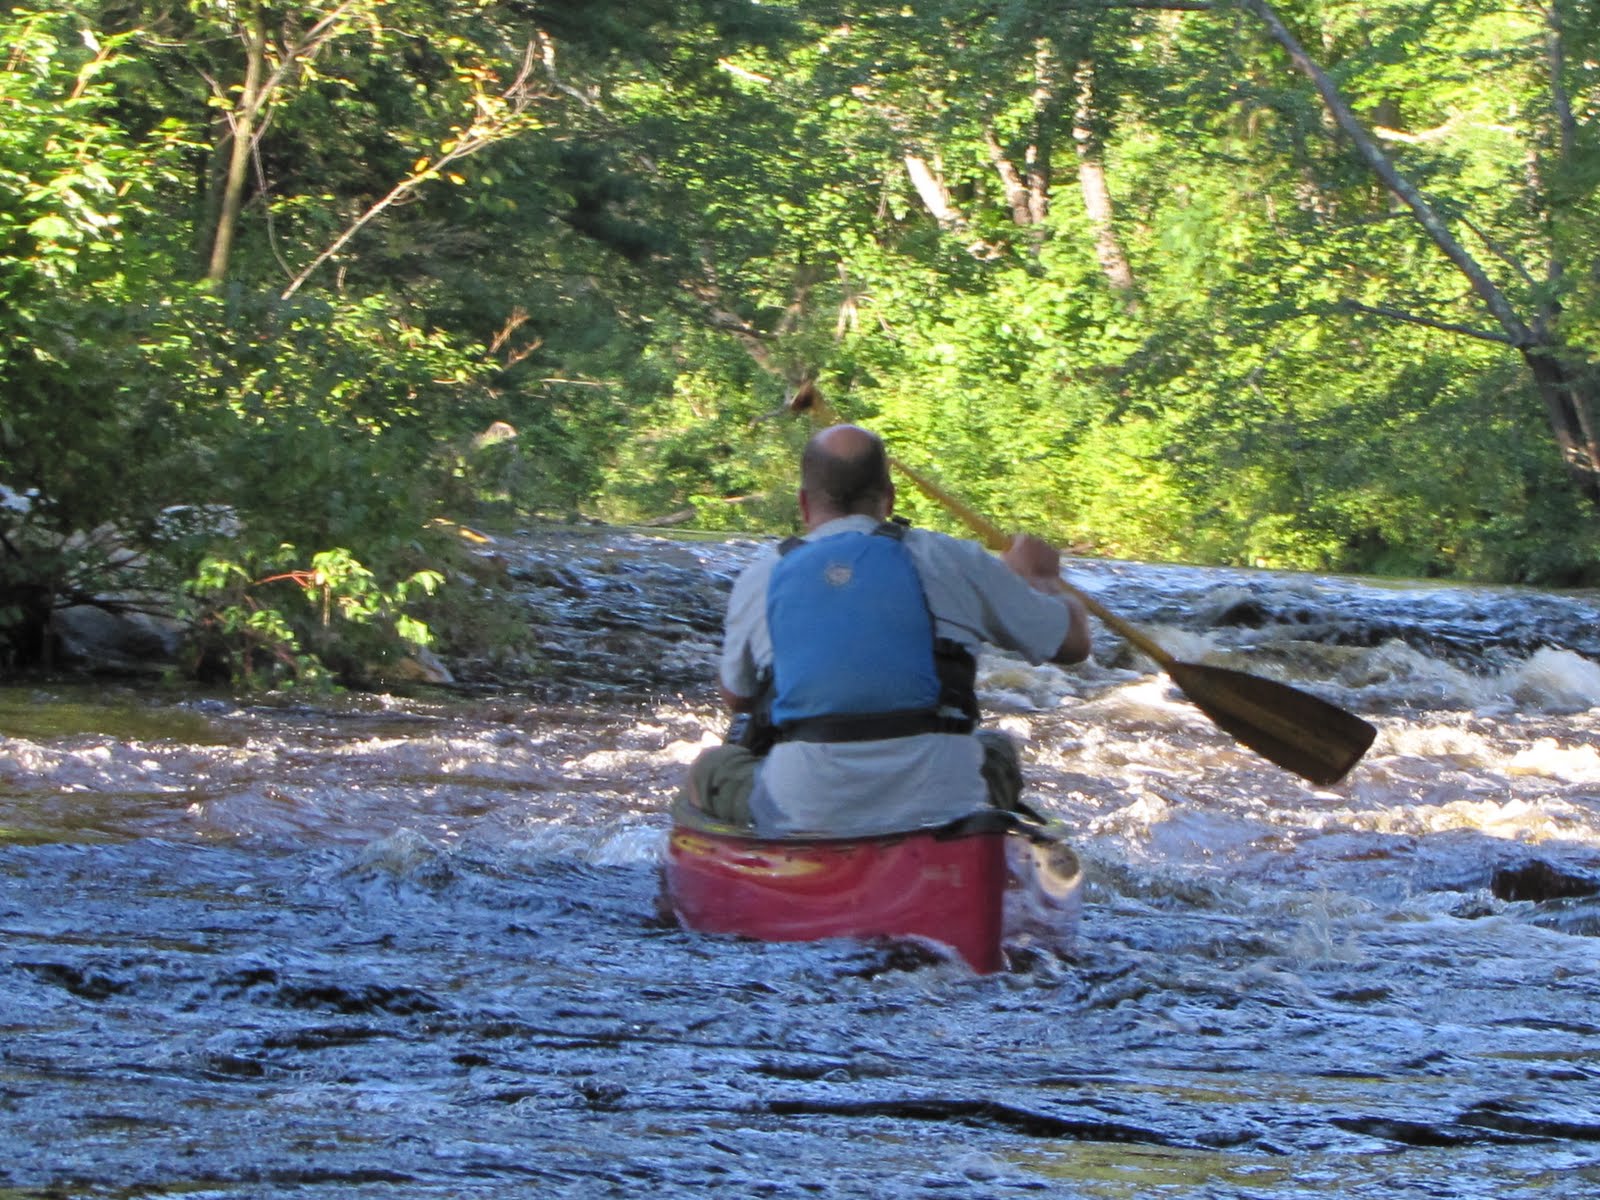
I managed to get out on the Merrimack River today with Scott and it wasn't a disappointment. The wind was at our backs or quartering us for the entire way and the river was up, maybe 90,000 cfs and about 8.5 feet. It was fast. I took the Eclipse with a light load and was really quite happy with the way it handled for the 7 miles or so we did.
In the wind the low profile was an advantage and it responded well enough for it length in the winds. I imagine with a full load it would do much better. On this section we ran we did encounter several sets of whitewater and at this level is was quite pushy in certain areas. I may have been spoiled by the Courier as I had to plan my turns and such a little ahead of time. All is good though, a sweet hull and fast.
More To Come
June 17, 2012
Damn, it's been a long while since I've worked on the hull. In the en term I have taken it out on several trips and am quite pleased with it. This past Friday night I did the local river and noticed there was a lot of creaking around the center thwart but didn't think too much of it. Sunday morning having some new gunwales ready to be rounded over I decided to take the old ones off. Holy Crap! When I pulled the screws out one side, inside and out broke right in half and fell! I just had to laugh and thought what a lucky SOB I was that it didn't fail in that last set of rapids!
 |
| This will be sanded and treated during the rebuild |
I carefully marked all the seat, carry handles, and thwart holes with tape ahead of time. I am keeping the full set of old gunwales for a template just in case. Now, I did get lazy with the cold cracks with the patching I did last year. I need some touch up and still have a short one to contend with. I also have to sand down the patches as well try to figure out a way to get the tape off. Sheer laziness on my part.
Also, half way through the Friday night run the wicker seat finally let go so my scrawny little ass poked through. I could feel it starting to go, it's one of those things that once it happens ya just know! A creaking noise and then a tad bit of sagging and the swearing beings. Hit a wave or try to tuck into an eddie and some more sagging and that God awful sound! Finally my ass is through like a thread through a needle! I have already ordered webbed seats! I'll save the old ones for when I have some webbing to redo them.
Goddamn, I hate cane seats, it's the third one to let loose on me! I guess ya can tell, eh?!
 |
| The old gunwales, you can see where they were rotted to the point of breaking |
 |
| New gunwales. One side is rabbetted. |
My intent was to sell this after it was fixed up but the more I paddle it the more I enjoy it. We'll see!
More to Come.
June 20, 2012
Happy Summer Solstice! Summer came in with a bang of 95 degree heat and humidity today. Despite this I want to move forward on this boat so I decided to measure out the gunwales so I can cut them and then round them over with my router. In the past I have relied on my tape and more than once I have come up either long or short. This time since I had one set of the inner and outer wales I came up with a sure fire way of making sure I was spot on before I cut.
I had three short pieces of rebar hanging around. I pounded those out in a straight line and then put the old gunwales, all bent to the shape of the hull, with the two ends resting against two pieces of rebar and then slipped the middle onto the other side and the middle piece of rebar so the wood was now straight.
 |
| Rebar support/brace |
 |
| The simple jig that makes a true line, hard to see but there is a 3rd brace at mid-center |
It was simple to just line up the new gunwale and mark it but I decided to make sure and pulled the old one out of the jig and then clamped it to the new one and all was well. Everything lined up perfectly.
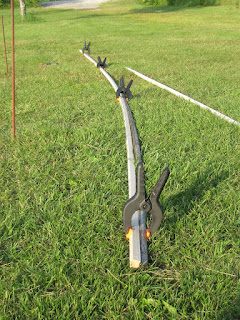 |
| Old and new clamped up |
 |
| Perfect measurement/mark for cutting |
I gave up to the heat and decided it was time to visit the AC and an ice cold can of liquid courage. Tomorrow when it is supposed to hit 100 degrees I'll cut and shape the ends.
I am pretty happy with this simple way of making measurements for gunwales. I can see a jig being made for this for future projects.
More to Come.
June 21, 2012
Today was gunwale working day. I needed to cut them to the measured length and then dry fit them. The only real problem was that it's like a 100 degrees out with humidity and all that crap! I got a loaded sixer of liquid courage ready, honestly should have been water, and headed out to do the grunt work.
From yesterdays measurements I was spot on as I cut each gunwale and then clamped it into place for a dry fit. What I did find is the outer wales had a rabbet cut into them, I knew about this ahead of time and was hoping it would all work out. Unfortunately they were cut for a hull with a thinner make up. As much as I tried with the clamps I could not make the inners and outers meet up flush. I do have some left over pieces so I am going to shave off the rabbet. It should work just fine then.
I ordered new seats and they came in today so after the gunwales are rounded over on the edges I need to mill some new carry handles and figure out what I'm going to do about decks. It's coming together!
More to Come.
June 27, 2012
For this time of the year it is cool but I decided to beat the incoming heat and humidity and fill all the holes from the old gunwales. It was back to taping the outside of the hull and then slowly filling all the holes on one side with G-Flex, putting my trusty wax paper on it and smoothing it out and then taping over that. The other side will come tomorrow. From there I need to take the rabbets off of the gunwales and start treating them for installation. I'm thinking that in about a week I might be able to start putting the gunwales on! One step at a time.
More to Come.
June 28, 2012
I ended up taking off the tape from yesterday's hole repair and was quite pleased to find that I didn't have do any sanding what so ever as it came out so smooth. Good deal and so I repeated the process on the other side. I do like the way this system of wax paper and tape works out.
Now, I have been looking over the cold cracks I fixed last summer/fall and am starting to mull over if I want to rebuild those. I was lazy and didn't peel tape off, didn't sand where I got lazy with the resin and didn't add any paint to help hide them. Maybe I was burnt from 7 months of working on the Colander?! All I know is that I'm not really happy with the looks of these patches. There is still some work to do on them even if I don't rebuild. Hmm, time for some reflection with a can of liquid courage!
More to Come.
June 30, 2012
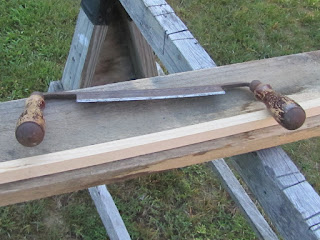
Got up with the sun and after a slew of chores finally got to the gunwales for this canoe. I bought them from Millbrook and they came with rabbets on one edge. Now that is a sweet thing but they were built for a thinner hull. When I dry fitted them they didn't even come close and instead of trying to find a filler for the gap I opted to shave them off. I mulled this over for a few days and decided to break out a tool I haven't used in a very long time, my draw blade. I don't have many occasions to use this but it would be perfect for this job.
 |
| Just a little bit off wood to remove, on the upper right |
I spent a bit of time with the sharpening stone to hone a clean and sharp edge, easy enough to cut through a thick piece of cardboard when I was done.
 |
| Add caption |
 |
| Out of up-state NY circa 1920, belonged to my friends father |
Now I'm not an expert with this and I truly suck as reading the grain of wood so I started slow. I had to remind myself of how to use this and kept adjusting the angle of the blade as I worked down the sixteen feet of skinny wood. I must say there is something so satisfying about using hand tools. I didn't want to sand down the rabbet and I don't trust my skills with a plane. With this tool I was able to really work the wood to where I wanted it. I will admit that there were some instances of tear outs and I was expecting that. In the end I had a nice pile of savings and had to do almost no sanding.
 |
| Nice clean shavings. |
|
|
It took about 2 hours to shave both gunwales down but well worth the time spent with a tool I haven't used in years. Might have to find more uses for this. I spent an hour or so rigging up a fence and feather boards for the router table but will need help to feed 16 feet of ash through it.
Done with that I took the center thwart and sanded all the old varnish off with orbital sander and then hand sanded it with 220 before applying spar varnish on it. It came out looking very nice, new almost. I will need two more coats on it to make it all good. All in all a good day!
More to Come.
July 10, 2012
For a couple of days I have been messing with the gunwales, dry fitting them, seeing which one went best where and then finally cut them. You would think with all that planning and fussing around I wouldn't screw it up but of course you're talking about me and I did! When I went to round over the edges I rounded one gunwale on the wrong side! AAAAGGGHHH. I was proud of myself and didn't swear this time or throw any tools in the field (lost too many that way), I just cried! I had to walk away for a while and gather my courage for what I knew would happen, the gunwales, of course the outterwales, couldn't be the inners which would be hidden by the decks, would be a tad short.
A few days later I had the courage to tackle this again and managed to carve off just enough so that I will be maybe a half inch short of the originals. In the scheme of things I guess that is not a bad thing but it just irks me to no end that I screwed up like that. The bitch of it is that I have another set of gunwales to do for another boat and am hoping I don't repeat myself!
Ok, so I dry fitted them and did some measuring and came out with four inches between the old holes on the lip of the hull. Where the hell I got that measurement is a mystery to me as it is really six inches! I had already filled in all the old holes with G-Flex and off set the new ones by a half inch from the old, WTF. In the meantime I drilled and countersunk all the holes on the new gunwales! Again, no swearing, no throwing of tools, just more tears! I slunk back into the canoeshed and in anguish had a couple cans of liquid courage and decided that since these gunwales were much thinner than what I usually use this might not be a bad thing, after all I have been told many times that sometimes more is good then less. Besides what was done is done! Liquid courage certainly helps sometimes!
All these little mistakes have me wondering about building the new decks. I plan on joining two pieces of ash, gluing them, and then cutting them out before sending them through my planner. Christ, yet another adventure in woodworking or maybe I should say misadventure, stay tuned!
Working on gunwales is kind of like watching paint dry. You drill, you sand, you router, and then you apply your coating. I decided to go with Watco Oil this time and of course it is nothing more than just applying, taking a walk, build a deck, go for a paddle, drive cross country and back and then rub it down and apply coat number two. Sigh! I figure by tomorrow I will be able to start the install of these bastards and might have the boat on the river by Sat. So, despite some "problems" from operator error it should all work out.
More To Come.
July 11, 2012
Today was supposed to be cutting wood day but of course the chainsaw had other thoughts and decided not to run, started just fine but wouldn't keep running. Carb? So, I tackled the gunwale install which took more hours than I care to think about. Goddamn clamps kept flying off and I caught one between the eyes but no blood. Of course I started out wrong by working from the end instead of the middle working out. On the second set of gunwales I did do that and all was fine.
I used #8 stainless steel screws due to the width of the gunwales and it worked out fine. I used to drills for the gunwales job, one to drill the other to drive in the screws but I did hand tighten every single screw at the end. Only one screw came through both the gunwales but it was at the end and the deck will cover that.
Now the one thing I did do from the original setup was to move the back seat forward by an inch and a half since I solo this boat and always paddle from that seat. I figure since I solo this will put my limited body weight somewhat forward and still offer me a cockpit big enough for poling. I also pushed it out from 33" to 33.5" which is so little I figured it would make much difference in performance.
In the morning I will put in the old carry handles for now. I'm milling out new ones but they will take time and start the new decks. I will use the old decks for now so I can get on the water with this hull as she is so sweet!
More To Come.
July13, 2012
Well, I wanted to use the old decks temporarily but due to the difference in gunwale width they came up just shy and won't screw in securely. My plan was to take my time making new ones out an ash plank I have but that is going to take some time and I want this hull on the water ASAP! In the past I have made decks out of Luan but they just plain suck and look like crap and then I get lazy and don't get round to making new ones, history does repeat itself!
This morning I ended up cutting two 13" pieces, the length of the old deck, and then I drilled pilot holes for dowels on each butt end of the ash. It took a little bit of doing especially cutting the ash. I bought one of those Japanese handsaws for the last fix and have become addicted to it. Now I'm not real fond of hand sawing but I will say that considering how clean the cut(s) come out it is well worth the effort. To be honest it has taken some getting used to compared to a conventional handsaw. I have found over time that the less effort is better meaning that I don't bear down on the blade as hard taking my time. Being a duel blade I can keep switching back and forth as each blade has a different set/size of teeth. Very nice IMO.
Using my drill press I measured for my holes and got them drilled, dry fitted the dowels several times, had to sand one down a hair and then using G-Flex in all four holes placed them. With the leftover I smeared both butt joints and popped them together. I used five clamps to secure it all and now just have to wait.
The next step will be to plane the board to the thickness I want and then cut to the shape of the new deck and if it comes out ok then I'll repeat the process for the second.
More To Come.
July 18, 2012
SHE BE DONE!
Six days shy of when I bought her I am done with the Eclipse!
During the last three days I milled out the new decks. Using my old and decrpit jigsaw I got them down to the shape of the old ones and called it good, I do have to fix the power cord on that damn saw though. Lots of hand sanding got it it where I wanted it and then three coats of Watco on each of them called it done deal.
Today when I got home I spent two hours fitting them, drilling holes and countersinks and installing them. For this process I only did hand tightening as the gunwales I got from Millbrook are much thinner than the ones I mill out. I kept to the original design with the decks sitting on top of the gunwales just like when I bought it. I think it turned out nicely and I really like the blond looks although I am amazed that most of the wood I used coming from the same piece all took on different colors/shades. I do like it. I did use the old carry thwart and bought new seats off Ebay at a fraction of the cost even with shipping. They aren't blond but seats are seats and a dollar saved is good in my book these days!
So, here's she is:
|
| When I got her! |
 |
| Now |
 |
| New Decks |
 |
| New Seats with old Hangers |
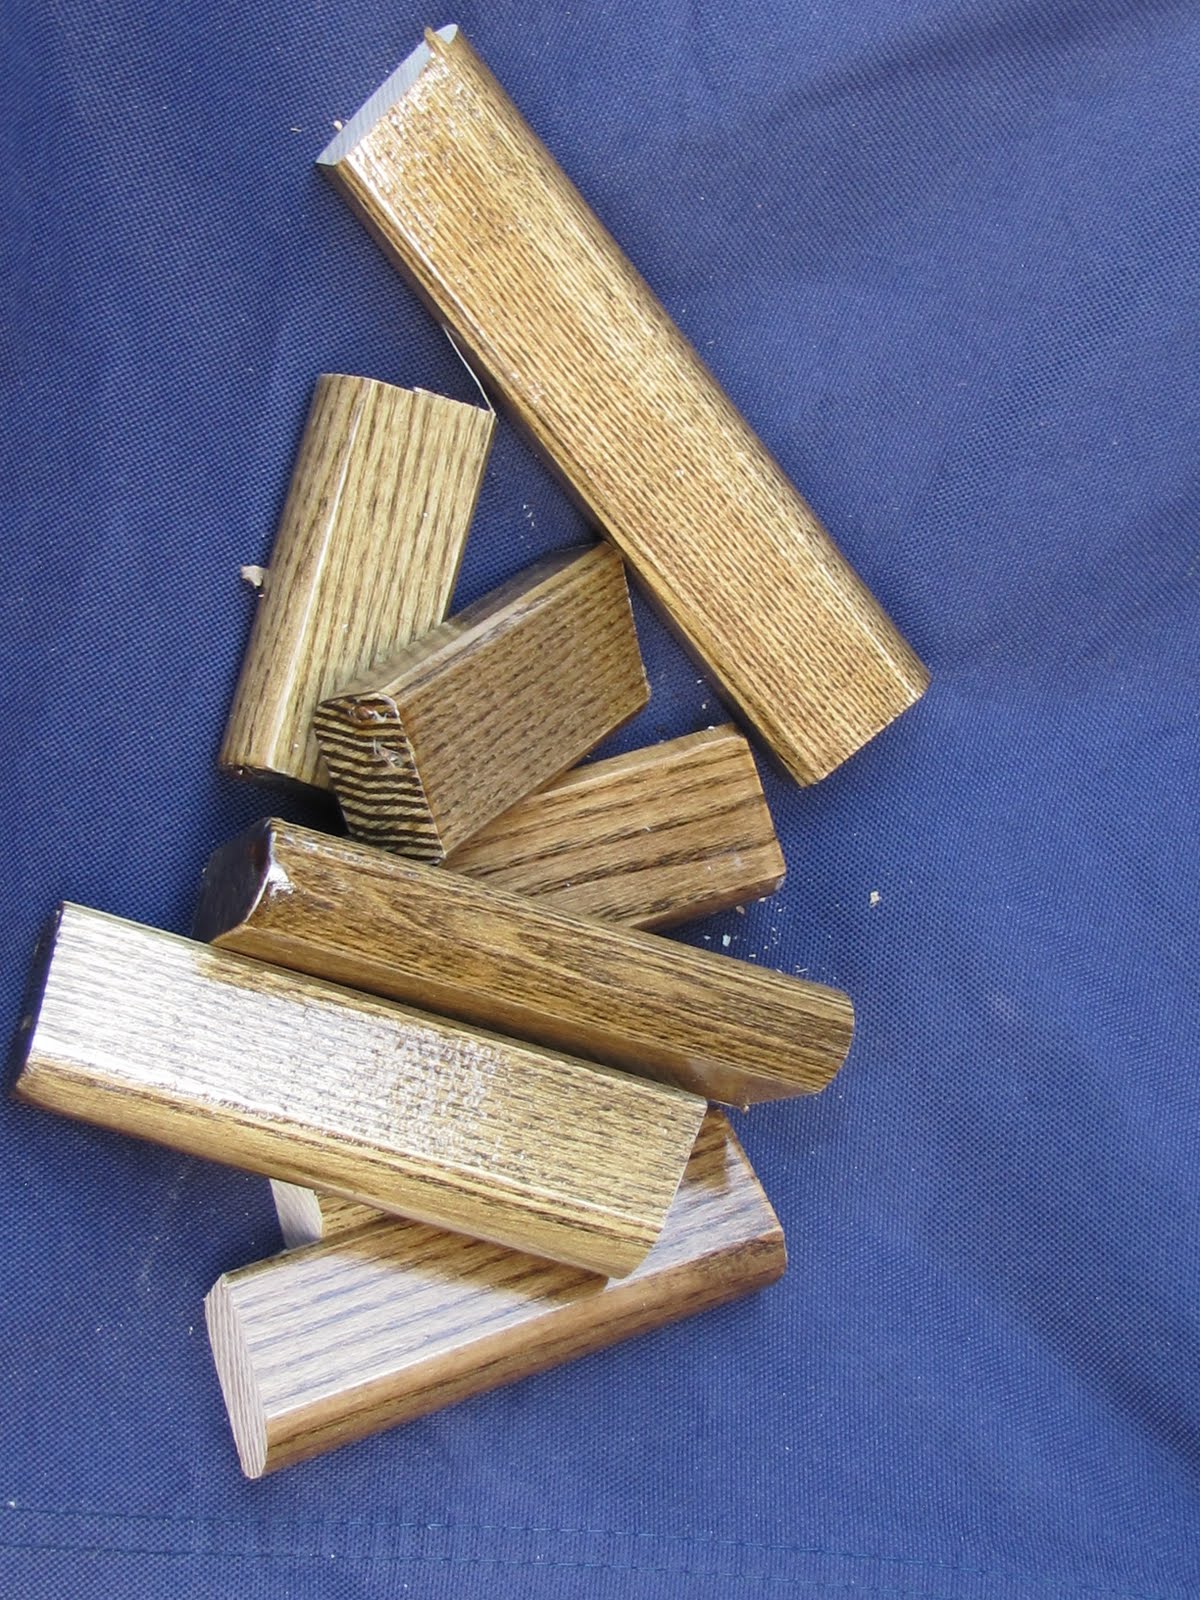
I used the old hangers until I paddle her some more and if I'm happy I will keep them but I have left over from cutting the seats to width that I can use if I want to lower them which I have done in other canoes.
 |
| Future Hangers |
 |
| Cold Crack Fixes |
 |
| Sweet looking Hull! |
|
Now there are some flaws but this is me working on boats some there are bound to be some! I'm not Kaz from Millbrook or Rob from Vermont Canoe, I'm just a dub who likes messing with boats and sometimes I luck onto an older hull that needs my attention! I do think I lucked out big time with this jem.
Back to the flaws though. The gunwales have a few high spots from running them through the router without help, that was me being stupid for not asking for help but didn't want to wait a few days for somebody elses schedule. I can fix those down the road, I got me a plan ya know! The cold crack fix is a disappointment to me. I was burned out from the Courier fix, seven months worth, and got lazy so in my eyes it looks like shit but I'm going to live with it. I realize there were many different options I could have taken but I was taken aback by the amount of resin they sucked in and got frustrated so did overkill which meant a sloppy look.
 |
| Ugly Freaking Mess! Damn! Me being lazy! |
But in the end the hull is sound, isn't that point, the wood is new and strong and there are many miles to be paddled in the canoe! I do want to add skid plates to it at some point as I really believe that the Royalex Lite is not nearly as tough and scratches much easier although I know that many would disagree with me. I will be using my mix of resin/G-Flex/graphite and Dynel as that is the most rock solid combo I have seen so far. That is for another day and now I'm going to go out and enjoy this new ride!
June 29, 2012
I decided to add skid plates as the KeelEazy had torn a little bit and I wanted a longer plate anyway to protect the ends. I used my Dynel, resin/G-Flex mix and some black paint. I tried to mix paint to get it to the color of the hull but was unsuccessful and decided that I like the looks of the black plates.
Using a hair dryer I was easily able to get the KeelEazy off. I did have to use a razor blade to get the adhesive off before I could clean the hull.
I marked off with tape for the new plate and then laid out my newspaper to avoid any drippage.
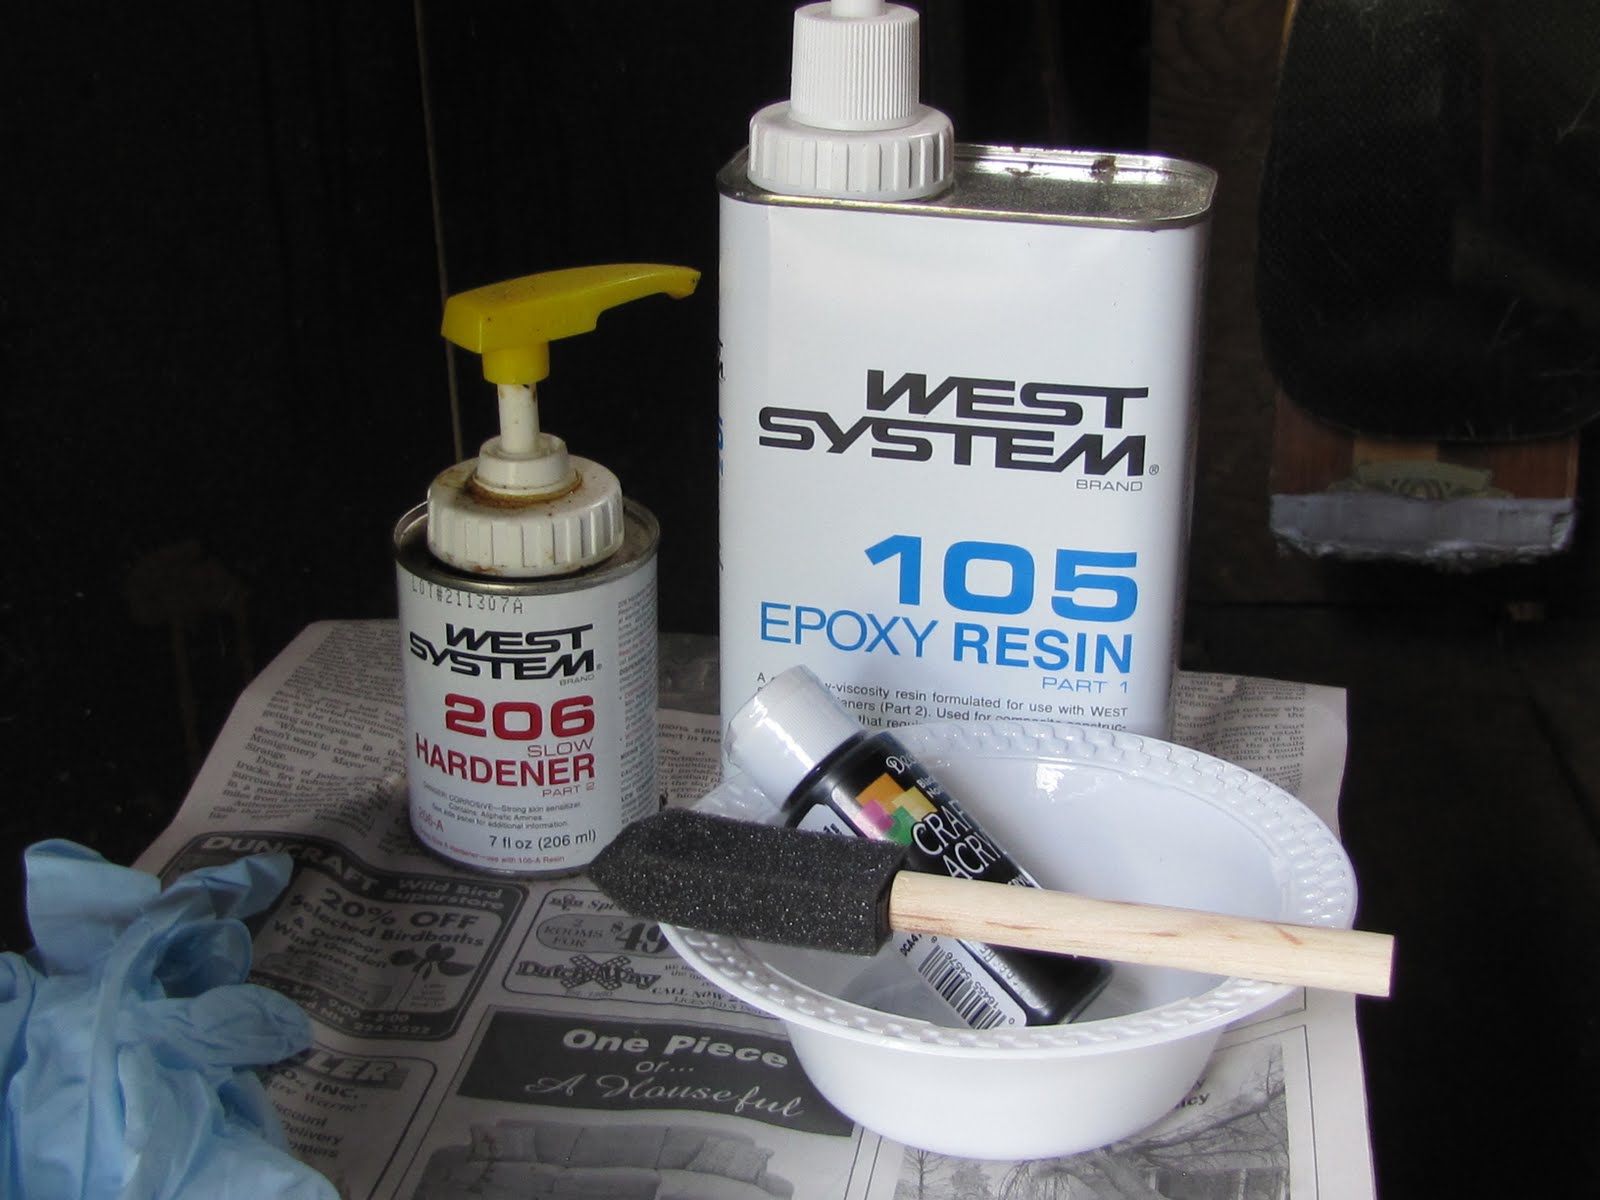
Using West System 105/206 resin I also add in some G-Flex and put a coat of this on the hull first and lay the Dynel patch on. I then add some paint into the rest of the batch and working from the middle out saturate the patch.
 |
| Dollar Store Paint |
I had forgotten that the paint gets a little washed out when I add to the resin so I added it straight to the patch/resin and smoothed out any air bubbles. Using the last of the resin mix I laid one more coat over this and called it good. Fairly simple to do and from my experience with the Courier I know these are rock solid and will last a good long time taking a lot of abuse.