The caveat was that the police had seen it somehow and it was now a question of trying to find the rightful owner. It got posted on Craigslist and once it got to my Humble Hovel I called Ranger Canoe and asked them if they had records, no, as they ship them out to dealers and being a 1988 model from the HIN they suggested posting on local paddling message boards which I did. I am waiting to hear on that one! Speaking of the HIN here is what it looks like and I found it unique!
 I
ISo, I waited for the light of day and took a good long look at it and decided aside from the seats and thwarts it is really in pretty good shape for a 24 year old hull. There are some problems with it but they are minor in the scheme of boat repairs, God knows I have worked on worse!
 |
| Ranger Otter, as is right now |
 |
| Needs new seats |
I started looking for cracks in the hull and saw only one suspect spot where there was a crack on the outside and a corresponding patch on the inside.

 |
| Above pic is the crack on the outter hull and this is the patch on the inner |
On the stern is this interesting patch that was put on by someone. Not sure why but will find out.


It looks like either duct tape or gorilla tape and I'm hoping it will peel off with some heat from the hair dryer so I can see what the deal is with it. The only other problems I found are on the tanks. Both have been breached somehow but that, again, is an easy fix.

 |
| A layer of Dynel will fix both breaches |
 |
| Maybe three inches has broken out |
Aside from needing a damn good cleaning all in all the hull looks pretty damn good! I had one of these many years ago and it was the canoe I really learned how to paddle solo in and am totally comfortable in. It holds a good load and handles well so I think if I don't hear from anyone about ownership it will be fixed up and added to my quiver of canoes.


More To Come.
November 21, 2012
The patch on the stern had me puzzled. I had to know it wasn't a good thing but I kinda figured it was quite fixable. This morning I decided to peel off the "patch" and see what was under it. The patch was nothing more than Gorilla Tape and a piece of heavy plastic covering a good size crack! It's going to be bitch to get all of the residue off from the tape but what the hell hairdryers and razor blades will get it done!
 |
| You can see the crack under the plastic |
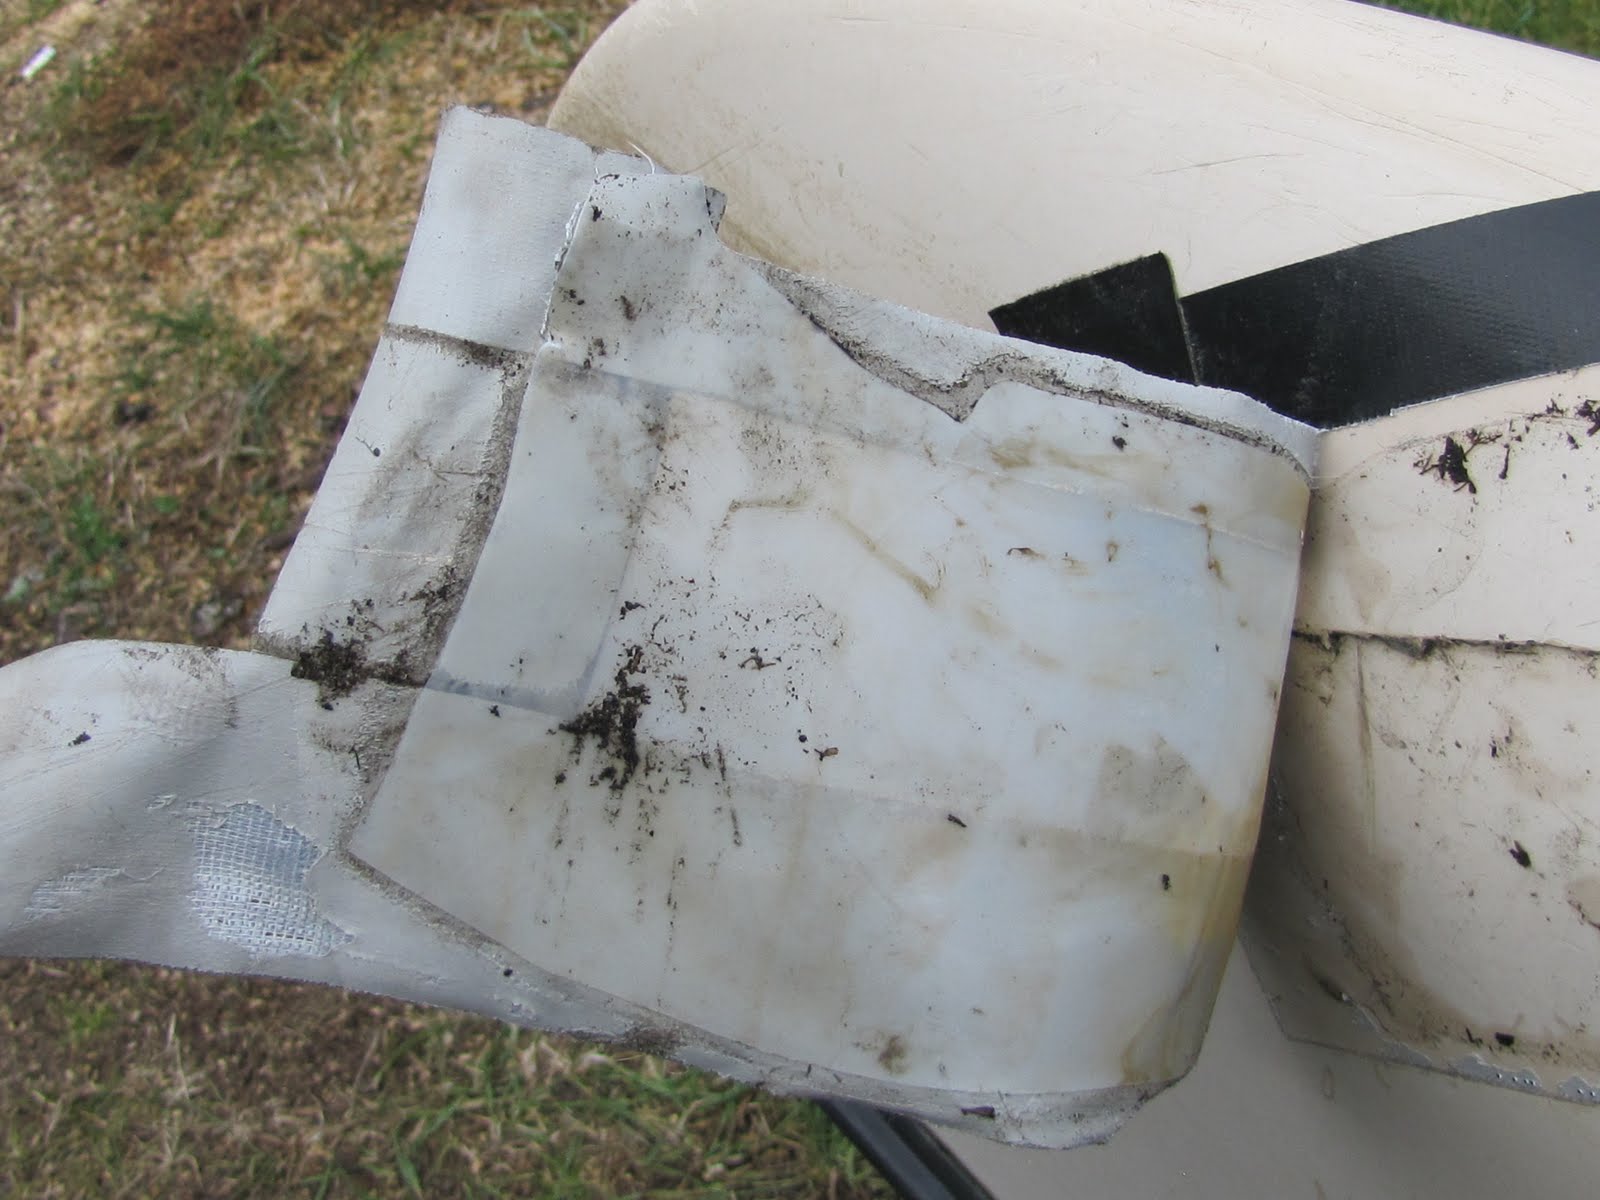 | ||
| Field Repair? Who knows! |
 |
| Pushed In. It Needs to Come Out. |
 |
| About Seven Inches Long |
After I got the patch off I flipped the hull and sure enough the crack is under the air tank so this is going to have to be an outside fix as I really don't want to cut into the tank and then repair that since the patch I have to put on that is fairly small. I have been very successful with the mix I use of West System/G-Flex/Dynel and will probably go that route.
After looking it over with a can of liquid courage I decided to drill the crack at both ends to prevent it from spreading further and then I will get out my trusty hack saw blade and widen the crack so it will at least pop out enough to make it even instead of pushed in as it is now.
This certainly isn't a show stopper but it just means more time and materials involved. What the hell, it's a freebie!
More To Come.
November 24, 2012
In a frenzy to get a kayak I just finished fixing off the property I did to move some moving. Kevlar Malecite up to the loft of the barn, move the Ranger in for work. Today I decided to make an attempt with a hair brained scheme. I want to fill the gunwale with plumber's epoxy. I got my roll out and spent a fair amount of time working to keep it warm, it warn't none to warm out! I only wanted to put a light and thin patch in so I could break it out if it didn't work. It took a bit and have a mind to bring my big lights up to warm stuff. Goddamn, some day I will have a heated workshop.
If I find this bonds despite the temperatures I will continue with this as a fix. Most of the epoxy stuff I have done has been more than rock solid! Going to give a bit of time to set up and then add more to for the outside gunwales shape. It 's all a crap shoot!
 |
| Broken Gunwale |
 |
| I cleaned it out with a Q-tip |
 |
| Plumber's Expoy, Good Stuff |
December 1, 2012
The test run with plumber's worked out well and I needed to add another layer on to meet the gunwale lines. This time I warmed the epoxy by the woodstove and then brought it down. Once kneaded out it was a whole lot easier to work it into the break and work it into a shape that I can sand down later.
 |
| Looks like a gob but it is pretty close to even |
So next it was time to try to get that tape residue off and I broke out the hair dryer and a razor blade. Not to good, hell it's snowing out and cold! I gave up after about twenty minutes. It's not defeat it just means a new plan and I've got one! Just hope the better half is game for a canoe in the house for a day!
As I mentioned earlier I wanted to get the big crack so it wasn't pushed in. I got out the ol' hacksaw blade and very slowly started widening the crack. I have found that being aggressive with the blade is counteractive. If I take my time and keep a gentle and steady pace the cut is much cleaner. I did drill three holes on the crack to keep it from spreading.
 |
| What is was |
 |
| Widening the Crack, reminds me of dental work! |
 |
| Now the edges are almost flush |
More To Come.
December 23, 2012
Well, I have been mulling over what to use to get the residue off so I can begin patching. I posted on message boards, I tried a few things with no success. I'm whining about this one morning and my better half says try this stuff, it works great on everything!
 |
| Great Stuff! |
 |
| Comes out in gel so easy to spread around. |

Now I have used belt sanders, knives, razor blades and other tools on other hulls and have become just a little bit skilled at scraping off a lot of different kinds of residues. This worked out almost perfect as between the blade and the solvent the tape leftovers and gunk came right off.
|
| With Tape Leftovers |
 |
| Cleaned Up |
More To Come.
December 26, 2012
Today after work I decided to add the first patch on the crack I just cleaned up. Yeah, it's cold out but I've done this before and decided I really want to get this done. Since it is the stern I started out with just S-Glass and from there will have decide what material I want to use, Dynel or a few more layers of glass. Of course no pictures because no batteries, again!
More To Come.
March 10, 2010

 |
| This cost me one can of Liquid Courage! |
 |
| To get this turd off |
 |
| I almost came up with a new swear word! |


The pictures aren't even worth a caption! Although there is enough good wood to recycle for something else! Now I am deciding whether to buy new thwarts or mill my own as I still have one thick piece of ash left. I left the seats in to help hold it together but they need a lot of work as well. I plan on getting that crappy cane stuff out and using webbing! Cane just sucks IMO, there's nothing good about it except for looks. Gawddamn how I hate that stuff!


Looks like a lot more work to come just on woodwork! The rest of the hull patches are minimal.
More To Come.
April 28, 2013
I finally got back to work on the boat after a long wait for warm weather. After sanding the patch I laid down another layer of S-glass. For the crack along the chine I decided to use Dynel as that is an area that gets a lot of play to it. When both of the patches cure I will add one more coat of resin with some white paint mixed to try to hide them a little. Probably look like hell but that's what sandpaper is made for!
I had ordered a new center thwart from Ed's Canoes a while back. The cost was little and to be honest I just didn't feel like milling out my own this time. I only have one piece of ash left and am saving it for down the road. I installed that and then took out the seats. The original layup was for two thwarts but I decided to go with just the carry thwart. Now the last set of caned seats I worked on I tried like hell to get the last bits of it out with a screwdriver. All I managed to do was break out wood! Goddamn cane! Since the seats still had enough meat at the ends to reuse I learned from my mistake and took my belt sander to get rid of the cane and smooth out any rough spots. I bought two rolls of webbing from Country Brook Design, they have the best prices that I could find after quite a bit of searching, and will be using that. Webbing IMO is the only way to go.
I still have three small holes to patch on the inside of the hull but that will only take an hour or so to do. While looking this boat over I have decided that instead of selling it I'm going to keep it. It is a pretty versatile hull, has decent freeboard and is long enough to carry a good load.
So, some more sanding and patching and then seat work to do. I have enough leftover wood to make new carry handles as the old ones are truly punky! I figure about another two weeks work and this hull will back on the water.
More to Come.
May 28-29, 2013
Two weeks my ass! One thing after another has held me up from working on the seats or the hull. I finally got them sanded and a four coats of spar varnish lathered on. I then tackled the webbing. Once I got the pattern/measurements down it was easy. In fact is was relaxing to do this part. I used a propane torch to heat up a blade to melt through the webbing to cut it to size. Then I just used a staple gun with 1/4" staples to secure the cloth. I thought for sure I wasn't pulling it taut enough but once the weaving started everything got drum tight! Sweet!
On arm of the stern seat needed a little work as it had kind of rotted out around the bolt hole but I sanded it out, filled it with wood putty and then covered it with cloth and G-Flex. Yeah, I'm a cheap Yankee but I've seen worse that have held up for a long while.
I wish I had taken more pics of the process but I was lazy! Here's what they look like after just a few hours of work.


I think this is an easy enough project that I will start saving all the shit seats I can and just re-web them. Tomorrow I need to get new hardware and then it just putting them back on. Next is fixing the three small holes and making new carry handles. Yeah, another week...my ass!
More To Come.
June 1, 2013
I picked up the hardware today and then decided to patch the two holes in the bulkheads. I did a half ass job but they will hold and that is all that really matters.

 | ||
| Rough patches but will hold |

Now something interesting happened as I tightened one of the bolts down. The gunwale actually caved in so the bolt head was sunken in! Goddamn it! It just shows that these gunwales are more brittle then I thought they were and at some point I will have to replace them. I got out some plumber's epoxy and filled the hole and put a washer in and then re-mounted the spacer and bolt. It will have to do!
 |
| Another Jury Rigged Fix |

July 4, 2014
After a very long time being a missing person from my hometown I finally made a showing, only took twenty odd years. One of the missions for this visit was to bring one of my canoes to my life long buddy who has been wanting one but is held down with three kayaks. I decided that since the Ranger is a sturdy hull with good and deep free board it was the perfect hull for him and his dawg!
When I pulled into his house the first words where, "A big canoe on a small car!" He was quite happy with it I think. So it has found a new home in a new state and will hopefully see new rivers.
So for me this is truly the end of this tale.