I don't know how to explain this, I have no excuse and I have no alibi. I bought a Pamlico 14'6" tandem kayak. I will say that the influence of a certain person swayed me in the decision. To be honest I have been a little unhappy with the Hurricane kayak I have. It seems to tender to me as I come from the canoeing side of the stream. What really was the deciding factor was the width and ease of packing gear. So before I get into the tale I need to know if anyone has a Grey Thing for sale or maybe I should just grow my own! (A Paddling.net thing! That poor kid, I hope we all didn't do too much damage to him!)
I had sworn off Craigslist for a long time but it's kind of like trying to quit smoking, you just keep coming back to it. I told myself I'd only look for free stuff but slowly wandered back to canoes and kayaks and it happened. There is a Pamlico for a cheap price and I got sucked in like a kid in a flooded drain storm! Next thing I know I'm committed and going for it. All I could think as I drove the hour to pick it up was what a dumbass I was. Like I really need another hull but goddamn it I do it.
Back home I off load and start looking it over. It only has the rear seat but it does have three sets of foot peddles/mounts installed in it. Now I am a novice at kayaks with rudders but even this seemed odd to me. As well there was only the stern seat. I stood there and stared at it for a long time and questioned my decision so had to go get a can of liquid courage, actually I carried six soldier's down to the Canoeshed fridge for future fortitude! I stared at it some more thinking where the hell do I start? Damn, I've done it again, getting into a project I have no idea quite what to do with! I headed back to the Canoeshed and freed another can of courage and came up with twenty different approaches as like Mr. McCrea I want to turn this into a solo boat.
The advantages are there for this hull and someone of my grand stature, well known as "That Skinny Guy?" The width of it is what holds the interest for me as my Hurricane Tampico keeps me too much on my game when I want to relax which I can do in a canoe. The Pamlico has nearly a thirty inch wide span and that is a number I can live with while paddling. It means stability and that leads to comfort and that leads to an enjoyable time!
I stripped it of the seat, which I will have to move up and then two of the three foot rails. I kept the middle set in place as I think they will be fine where they are.
 |
| Good lines |
 |
| Three sets of foot peddle mounts |
 |
| One Big Ass Cockpit! |
I started playing with the seat placement, it is a Phase3 seat which looks mighty comfortable. Since I wanted to use the foot peddles where they are I kept moving it back and forth finally settling on about sixteen inches forward of the back of the cockpit. I made a call to Mr. McCrea who has one and has already soloized it. He did a quick measurement for me and lo and behold it was spot on! Now I need to figure out a way to re-attach it to the hull. The way it is it is too narrow and I don't want to squeeze the hull in.
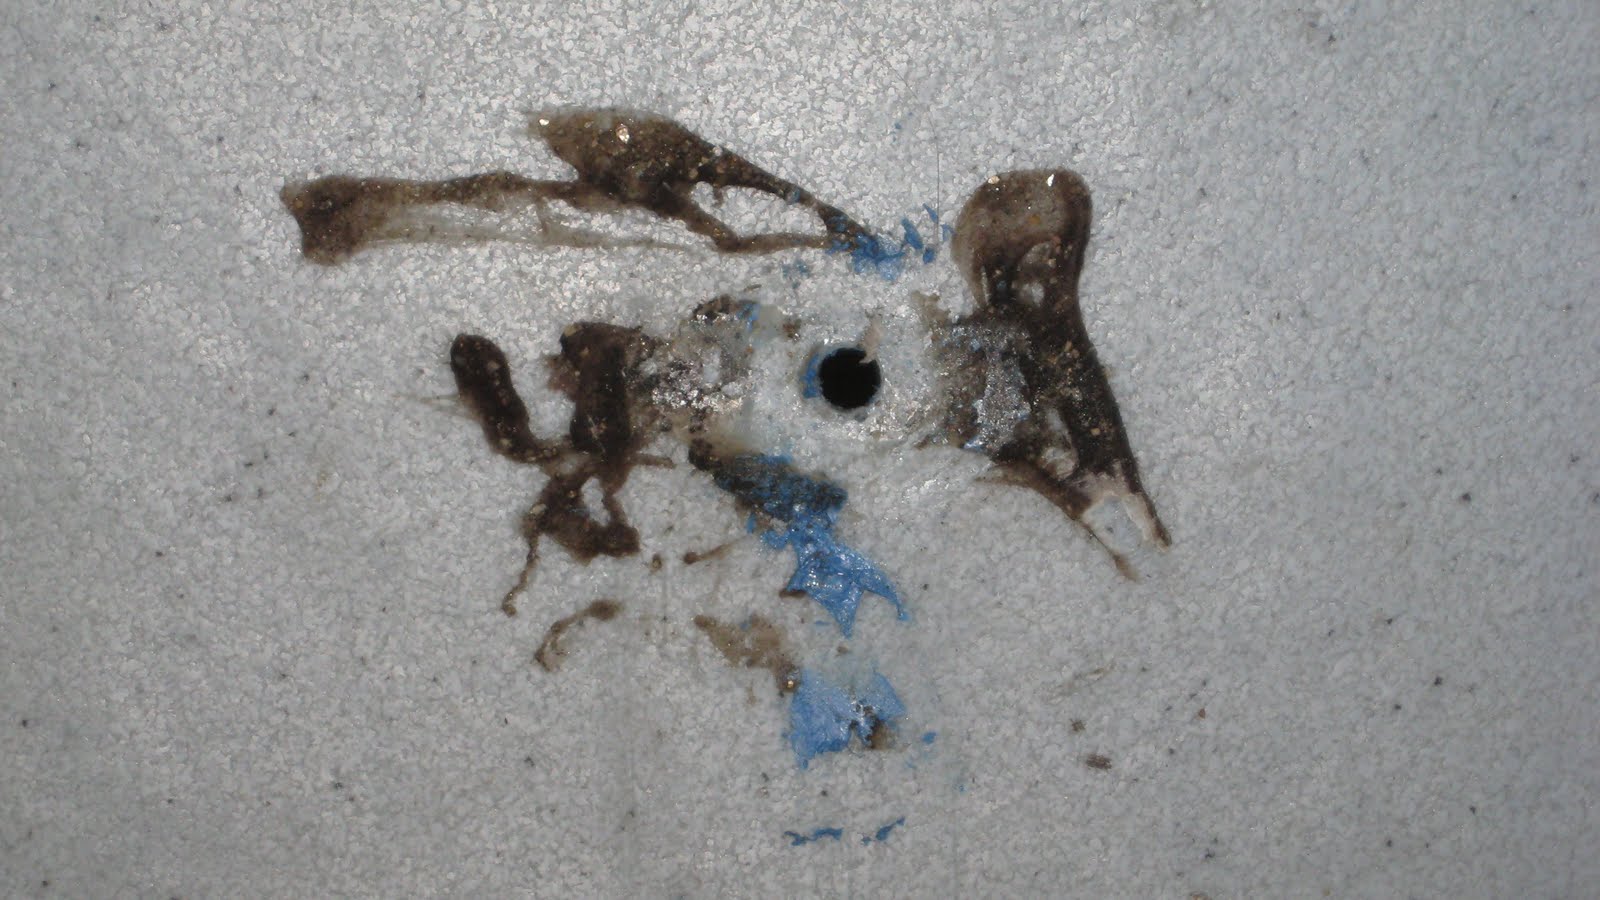
In the meantime I have holes to fill from all the crap I took out! I'm quite use to this after the Courier Project. It was just a matter of G-Flex (God how I love that stuff!), wax paper and tape. I filled and taped the top six holes. Because they are way above the waterline I just used G-Flex.
 |
| Wax paper over G-Flex taped down. The same is done inside. |
 |
| Totally flush patch inside and out. |
More To Come.
August 25, 2013
Today was fix the seat day. I have been mulling it over ever since I got this hull and decided the only way to attach the seat was to make some extensions from the seat to the hull. Being a cheap ass Yankee I looked around for something to use that I have stored away. What I ended up with was a hunk of aluminum that I thought would fit the bill. Thin enough, easy to drill through and light.


 |
| A view of the bracket |
 |
| On the other side |
 |
| What is that stuff? |
 |
| Cleaned up |
 |
| My friend, Mr. Razor Blade |
More To Come.
August 26, 2013
I wanted to get the seat in so went for that. I placed it at the mark and then drilled through the hull and marked the aluminum so I could drill it to accept the bolts. It only took a few minutes.
 | |
| Hole in the Hull, crappy picture! |
 |
| Aluminum Marked for Drilling |

 |
| A Sixteenth Of A Turn At A Time To Tighten |
 | ||
| Seat In Place, Guess What I Forgot? |
More To Come.
August 27, 2013
There are two missing steps to this hull being ready for water. The first is filling four more holes. The second is making some extension straps from the rudder cables to the rudder rails. I decided to use some strapping and quick release buckles instead of purchasing more cable. Once again I had these on hand and I'm cheap so it will all work.
I did a little measuring and then melted a piece of webbing free. I put one end in the male end of the clip with the ladder lock and gave it a pull to make sure it would tighten. Please don't do this in a quick motion and more important don't do it at face level! I put the strap in wrong and basically pulled hard enough to punch myself in the face!
Once I had it place the correct way I took the whole affair and tried it out by placing the boat on the ground, sitting in it and making sure the length was right. Spot on! The only thing I have to do is, God Forbid, sew! I hate sewing and this is hand sewing with webbing which is even worse!


I do believe this will take more than several cans of liquid courage to get through but I want this part done so I can take it out for my first test run. I will need to make a utility thwart but have plans for that and have the wood on hand.
More To Come.
Addendum: I just finished sewing. It sure looks fugly but is a strong bond. I used waxed thread and a curved needle which passed through the webbing without a hitch. I now have half a dozen punctures on my digits but it is done. As far a cans of liquid courage...only two! The boat is ready to launch but still need a bit of tweaking here and there.
August 30, 2013
This evening the NH boys got together for a paddle upstream and a float back to the cars on the Merrimack. Our destination was just a mere five miles or so up to the bottom of Sewalls Falls rapids. This was my maiden voyage in the Pamlico which somehow become known as the Barko Lounger, so be it, it's good for a boat to have a name!
I really didn't know what to expect and was tad nervous. As soon as I planted my scrawny ass in the seat I knew it was a good deal. Nice and stable due to the width of the hull and the Phase 3 seat was nice and comfortable, the back rest came up high enough so my back was finally at ease. Now this boat is not nearly as fast as my companions boats but that is ok, I'm more into comfort these days verses speed. The first thing I tried out was the rudder and it was simply wonderful. Instead of bulling my way upstream with my arms to steer the hull I just paddled a steady pace and used the rudder to find my way against the current. I found that quite nice.
On this voyage several things became evident to me. I could actually turn around and look behind me without fear of tipping over, something that my Hurricane kayak keeps from doing. This hull turns easily due to its V hull shape, the Hurricane has a keel so turning takes some planning. Now for those of you who actually read this a bailer is one of the most important pieces of equipment you can take with you. In the canoeing world it has a long list of uses. I am a confirmed believer that the most important one is getting rid of water, my water, taking a piss while in the middle of the lake instead of going to shore. This was the test! I was successful! I will stop this thought there!


I had to tweak things here and there while in route but I was able to do it all while seated in the boat without going to shore. So in a nutshell I was more then pleased with this boat. She ain't pretty and I know in the paddling world it's a hull that is kind of looked "down on" but for what I want to do this is pure joy.
More To Come.
Sept 1, 2013
I started work on the thwart today. I cut a blank out of junk wood for placement and the cutting the curves to fit the cowling. In the end it is just far enough in front of me to miss my knees and I only have to lean forward a hair to reach anything on it.
So why a thwart on a kayak? I digress for a moment and will revert back to the light side of paddling, the canoe! In my canoes I use old lobster trap filament mounted on my seats to hold small stuff. I works great because I don't have to open my bucket, a drybag, it's all right at my fingertips. That there be a Hal the Gullboy trick! On this hull I can't do that and I want to mount my Spirit Sail as well as have some bungee as well to hold down other small items.
After I got the template made I decided to use Butternut wood that I have on hand for the final thwart. It is light, water resistant, has a beautiful color when done treating. It took all of but an hour to get that cut and marked on the hull for the placement. I drilled four holes for the sail mount and bungees then sanded and started treating with five coats of spar varnish. I'm able to get two coats on a day by simply not being a lazy ass! I do one in the morning and then sand with 0000 steel wool and then add another coat in the evening. I will be done with that part on Thurs.
I have two thoughts on attaching to the hull but will get into that later except to say it is chemical vs mechanical or maybe a mix of the two!
More To Come.
August 4, 2013
The final coat of varnish was on the thwart so I was ready to attach it to the hull. I thought about screwing it in but after looking at the cowling I knew I could not get a direct hit with a screw. I had talked to Mr. McCrea about this and went with his method. I got out the last of my G-Flex and mixed it up and then slathered it on the butt ends where it would meet the hull and then on the top where it would meet the bottom of the cowling. I actually was smart enough to lay down a layer of wax paper, taped in, to keep any drips off the rest of the hull!
 |
| The Dry Run |
 |
| Better Then A Condem |
 |
| Clapped In |
 |
| Enough G-Flex To Form A Bead |
Next was the seat. I needed to glue the foam pads onto the bottom and decided to use what I had on hand which is Elmer's Multi Purpose Adhesive. I did one side at a time and weighted it down with logs for the woodstove, Ash, nice and heavy but maybe should have used Oak!
 |
| Seems To Work! |


So now it is back to the waiting game. Tomorrow I should be able to take the clamps off of the thwart, drill some holes for the bungee's I want to put in (I forgot to do that), and then glue the seat in!
More To Come.
August 5, 2013
I took the clamps off the thwart when I got home and the bond was solid. I put the Scotty on and then drilled holes for the bungees since I forgot to do that earlier. White and black, Ying and Yang!
 |
| For The Spirit Sail |
 |
| To Store Small Stuff Under |


During the dry fit I also marked where the front of the foam was with tape and ran a marker over them so I could see them. That really helped quite a bit as I had a piece where the back of the seat is.

I used a foam brush to spread the resin in a thin layer in basically the shape of the foam on the bottom of the seat. Just enough so there would be a good bond but not enough to run into the channel. It worked slick!

The beauty of using this resin mix is that it's waterproof and has a long enough working time I could afford to take my time with the seat placement. Once I had that done I slide the brackets back into position and dropped the bolts back in so I now had a three point way of securing it. I dropped a couple of crappy cement blocks on the seat and by this time tomorrow it will be good to go with the exception of just tightening the bolts!

From here it's just tweaking a few things that I do want to add but all of that is minor. Even if I don't do those I could take the boat out just the way it is.
More To Come.
August 6, 2013
Well the seat turned out sweet! Very little play and after I tightened the bolts that almost disappeared as well. Since I used a piece of shit crumbling brick I had to vacuum the hull out. While moving it I heard creaking coming from the thwart. That was a sound I did not want to hear! Damn! I looked underneath and saw where I had made my mistake. I kept the thwart ends as butt ends when I should have taken the time to try to router the ends. It's a crappy picture but I think you'll see what I mean.

I should have put some kind of a shoulder on that end so it would be a three point contact instead of two like it is. Earlier I at opted for mechanical meaning nothing more then screws but opted to go this route. After looking this over I decided to add some screws. I used half inch and drilled through the top of the cowling. Not my favorite idea but was needed in my opinion. Took very little time!

Due to the fact that it's so far forward I won't have to worry about it and it's flush enough that I don't think it will hurt a spray skirt from abrasion, if I ever get one.
I have a few more modifications I want to build in so I guess there's...
More To Come.
August 19, 2013
The time had come for a real test run meaning a trip. This year we bailed out of Umbagog and decided to do Azicohos up in the Rangley region of Maine. Our plan was to paddle up the lake about half way and base camp for four days. I was packing everything but the kitchen sink so this really was a good test and as well I was hoping to set up the sail!
 |
| Loaded up |
 |
| A side view |

 |
| Gee, what could be in that blue cooler? |

 |
| Halfway up the lake |

I had some concerns about using just the bungee on the decks to hold stuff in place and had thought of adding some more pad eyes for tie downs. It suddenly dawned on me that all I needed was a loop of rope on the existing ones that the bungee was using. This worked great as I now had the bungee to hold gear down but could also lash it down even more securely.
 |
| Small loop of rope added to the pad eye |
 |
| Another View |
 |
| Held this cooler full of liquid courage in place perfectly! |


I did have a problem with the Phase 3 seat though. I ended up needing more lumbar support just cause my back hasn't been right since I broke it. I ended up taking my fleece pull over and folding it and jockeying around till I got it right and was comfortable for the next two days of dubbing around on the lake! So now I have to make something that I can use on a permanent basis but will have to be able to take it out for transporting.

More To Come.
October 13, 2013
My old paddling buddy Hal the Gullboy and I needed to hook up so I could get a canoe spray cover off of him. We met at his abode on Cousin's Island, ME and decided on a paddle across Casco Bay into Broad Cove and then up a small tidal stream to a road. This was where he planned on putting in in the future for a day trip back to his camp.
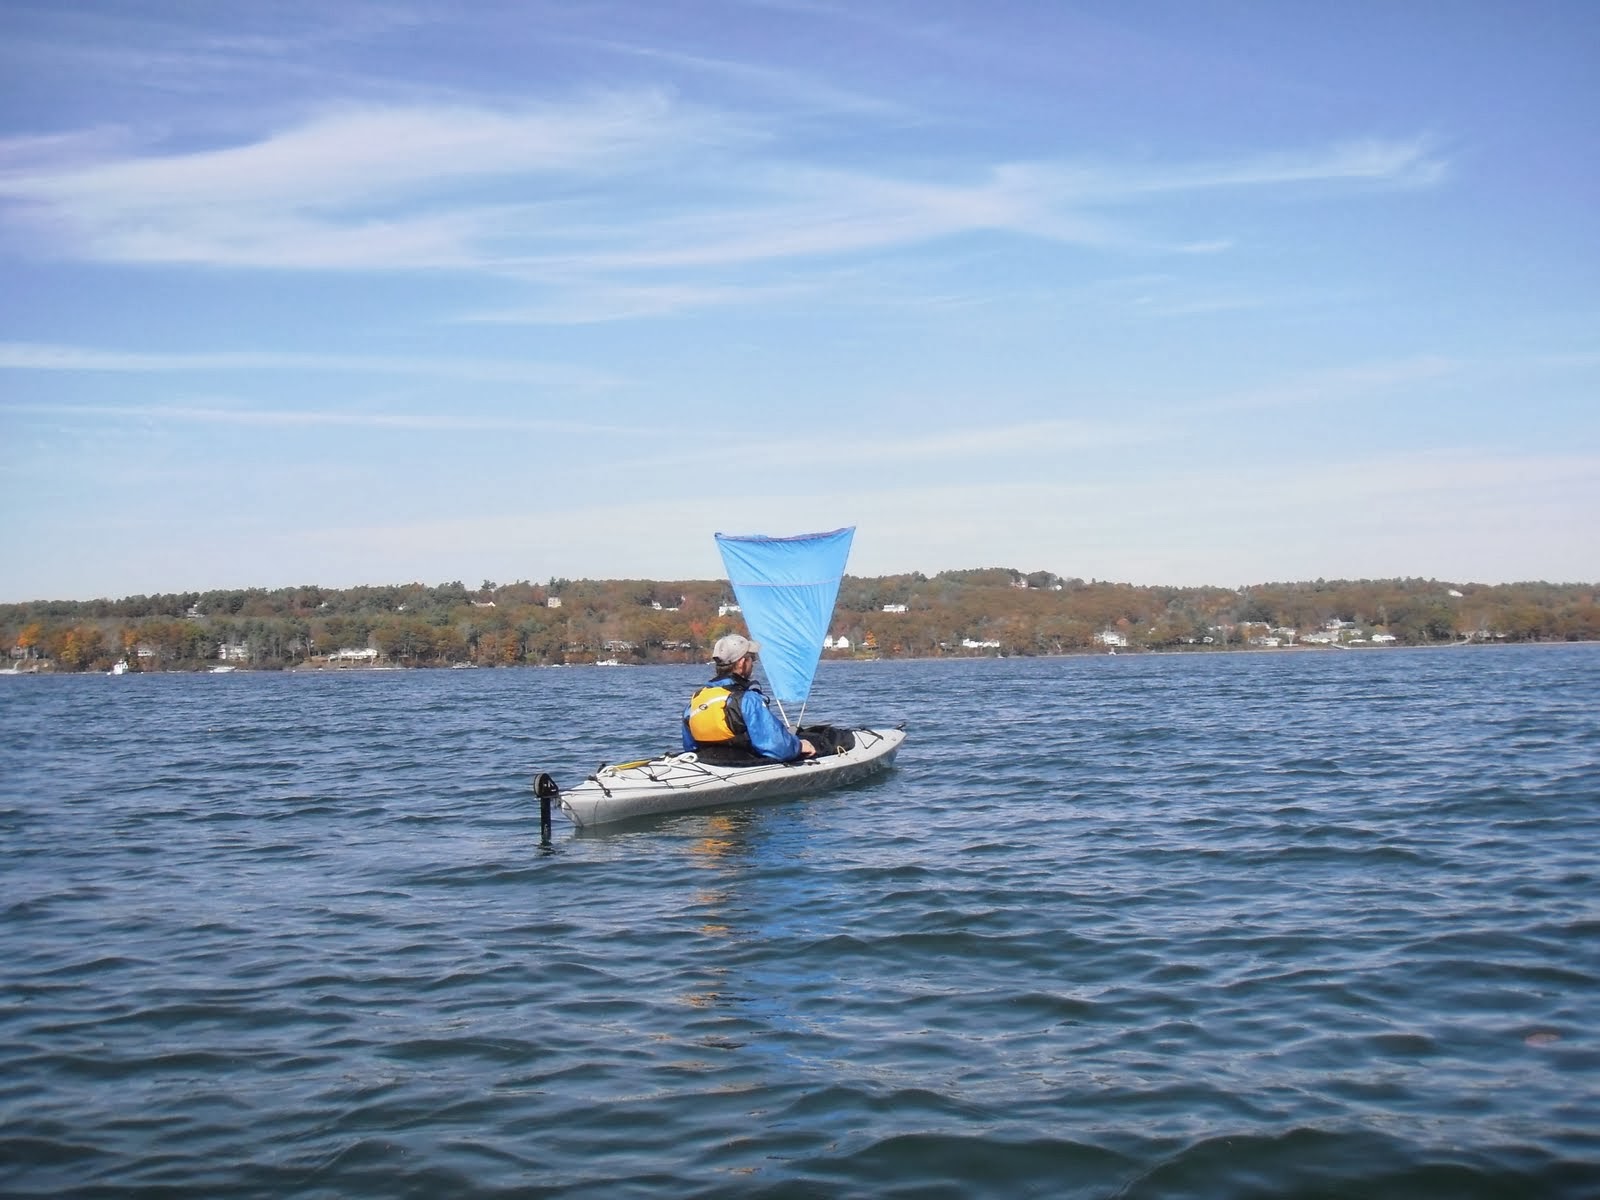
My goal was to try out the new paddle I bought and the spray skirt that Mr. McCrea sent me that was actually made for the Barkolounger and to try out my sail. The paddle over was enjoyable, lots of sun, a gentle breeze. I do love having a rudder! I do need to tweak the rudder peddles though. I know why they seem to stick a bit but I'll get into that when I do the fix.
We made it to our destination and turned back for the paddle out. Of course we had a headwind and it had picked up a little. As we came out of Broad Cove the waves were up a bit and we headed directly into the wind and away from the camp so we could turn and catch the wind to see how the sail worked. Paddling into the waves was just too much fun! My bow would dig in and I was mighty glad to have that spray skirt!

 |
| What? |

 |
| All pics courtesy of Matt Hopkinson |
More To Come.
November 15, 2013
I decided to put a second thwart in behind the seat. It will help stiffen up the cockpit and give me another place to grab when racking the boat on the car. I had a piece of Butternut already cut from a previous project so plan on using that. It is much thinner then the front thwart but will give me another place to add tie downs. Alas, this part of the project is on hold as I need my wood planner but someone decided to steal it out of my workshed. I now have to wait until a new arrives.
.