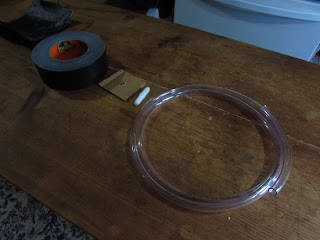
I've been reading up on this for quite some time now and after a good friend got me a vacuum pump for free I finally pulled the plug and bought the rest of the equipment I would need, meaning about four dollars worth of hose that would fit the nipple and then some dollar store plastic lidded containers and some double sided tape. My plan is to, for first attempt, use materials I have on hand.
First task after fitting and cutting the tubing was find a way to attach it to the lid of the holding tank, the cheap container which will act as a reservoir for excess resin running out of the hose, the pot. I need to put a layer of sand in the bottom to act as an anchor to hold it in place as the hose is big and has a tendency to twist to where it wants.
My first thought was to put some Gorilla tape on a portion of the lid and then cut an X into it which the hose would push down through. Oh yeah, it worked but left enough gaps that it would sound and act like a sucking chest wound. Nope, not gonna work.
 |
| The pump with hose |
 |
| Resin Res and Gorilla Tape Sealer |
 |
| First Attempt. Too Loose, Bad Seal |
 |
| Gorilla Tape on the inside |
 |
| And Outside |
 |
| Ready to melt a hole for the hose |
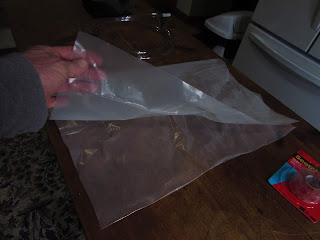
Next step is to start making the bag which I'm going to try using four mill plastic I have on hand, double sided tape but am thinking I might need to pick up another nipple to build into it. Will it work? I have no idea but that's what I said about steam bending wood.
More To Come.
Feb 2019
It warmed up enough today to fire up the shed heater and give a go at making the bag. It was three degrees in the shed and a balmy minus two outside when I started, had to wait for the shed to warm up to at least fifty degrees before I could start.
I had gotten all my parts together ahead of time, three pieces of six by six carbon fiber squares, the backing I thought I would need for the air hose and enough three mil plastic cut out to form the bag.
 |
| The Ingrediants |
 |
| Double Sided Tape |
 |
| Backer for the air nipple |
 |
| Assembled |
 |
| Heavy Plastic for the Bag |
When I opened it in the morning there were areas that were starved of resin and despite having strength was a little brittle. Guess I need more resin.
More To Come.
With a few days to think things over I knew the problem was the stem valve in the bag or the lack of a proper one. I looked up on several sites about that piece of equipment I needed and it was at a price being a cheap ass Yankee I didn't want to buy one.
 |
| Thru Bag Stem |
 |
| Nipple, washer and rubber washer |
The idea is that once the nipple is pushed through the bag with one set of washers on the outside the second set is placed on the inside of the bag and then tightened down with the nut. All good in theory BUT I couldn't find a damned NUT to fit that threaded part of the nipple. It was causing me a lot of angst!
On the third trip to the Box Store I finally found it, a five-eights inch nut with a plastic thread built in. After looking at the store bought on I also bought and extra size washer. This comes into play in a few minutes.
 |
| 5/8" Nut...NUT! |
Basically I glued the small nuts to the extra large washer and then the nut to the the top of those to create a gap that will allow air in but not the bag as the base washer should hold it down enough.
 |
| Dry fit before the Nut is glued on |
 |
| Two Views of the Base |
I did spend time in the shed, a heated shed by golly, and constructed a bag for the Carbon Fiber plates I'm going to give a try at making for deck plates.
More To Come.
February 16, 2019
Today was attempt number two with the new valve design. This time I used four pieces of carbon fiber and was more than liberal with the resin. Vacuum bagging is kind of like painting a wall. Lots of prep time and then sitting back and waiting for it to dry!
I had already made my bag sealing up all but one side which is a mistake. I think if I had left at least one of the two sides I had sealed left open it would have been easier to get the piece into the bag. Live and learn. The first thing I did was to apply some Gorilla Tape to the inside and outside of the bag for the valve.
My plan was to use a metal washer with a rubber washer on each side of the bag for a good seal. Gotta love a theory but the problem was it proved to be to "thick" so the thread on the valve wasn't deep enough to fit in the nut.
 |
| Too Many Parts to Fit |
 |
| Valve in Bag |
So this time I decided instead of just plopping the CF onto waxpaper I would use a piece of cardboard with the waxpaper on taped on it as a release which I've used for many years now with success.
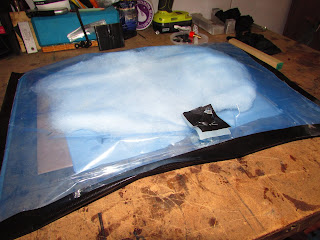
After I got the resin onto the CF I put a layer of Peel Ply on top of that and than a layer of breather cloth, in this case since I read up on this some material for stuffing pillows and then sealed it all up with more Gorilla Tape.
 | ||
| The White is the Breather Cloth/Material |
This is where the placement of the valve is important, another live and learn thing. The valve and the edge of the resin soaked CF met. Also, I need to make one more modification to the valve at some point as the plastic bag despite the new design made its way into the valve on one corner. More on that later. I was pretty happy with the way it all worked but have notes on what to not do next time. A couple of pictures of the valve under pressure!
I did bring the whole bag up to the house and left it on one of the heat vents for a few hours before I opened it. I had to use a knife to separate the CF from the waxpaper, next time I will use Peel Ply on the bottom as well. I was actually a bit disappointed that regardless of using extra pieces of CF it was thinner then I expected. Certainly good for something but not for a deck which was my intention on this process and if my eyes are deceiving me it looks a bit starved of resin in a few areas.
When did this without vacuum bagging and just weight on top of he CF it came out much thicker. So I think it might be back to the drawing board for some modifications and figuring out the amount of layers I need to put on to make a stronger piece.
More To Come.
I kept thinking how the bag keeps sucking into the valve and decided I'd try yet another approach to that whole setup. Using some fairly heavy wire I cut small pieces after I had bent them into an arch of some kind and then using E6000 adhesive secured the top of the wire to the nut and then the bottom to the large washer to form an extra barrier to keep the plastic from getting sucked in.
I have absolutely no idea of this was a total waste of time and materials or if it will help. I will find out as I'm hell bent on getting another trial in but this time I want to fabricate a set of new deck plates for my MR Courier. I will be using the surviving plate as a mold, so to speak, and have a plan on a release agent and will be keeping my fingers crossed that it works.
 | ||
| Wire Barriers added I added six in all |
More To Come.


No comments:
Post a Comment