Through the generosity of good friends I found what would normally be called a kayak but is a decked canoe. This one is from nineteen seventy seven and for a hull this old is in great shape. Yes, there are things that need to taken care of but considering the amount of boats I've fixed in the past this is child's play.
This a sixteen foot six inch hull. It came with most gawd awful uncomfortable seats I think I've ever seen, maybe a design from the sixteen hundred torture chamber. It was the first thing I cut out and kicked into the field. Now what I did not know for transport was that the seats are held in with cotter pins but neither myself nor the owner either knew this or forgot about and on the four hour drive home my care took a beating, so much for the paint job!
Now in the meantime McCrea emails me about a Klepper tandem he wants so I go pick that up. Very unique but I'll save that for Mr. McCrea to write up about. The plan was I was going to load the boats on my car and make by way to Freeland, MD for some shop time.
May 20, 2015
Mid-day I loaded the Klepper and the Optima and set off for Maryland. Even with several different routes to choose from none are easy. From this experience Connecticut was by far the least driver friendly traveling state I drove through. On my eight plus hour journey I did get a lot of looks at the two thirty-eight year hulls on the top of the car. Made me grin more than once.
When I finally arrived at the abode of McCrea I was treated to the presence of Joel Beckwith, one of the finest paddlers and persons to know. Of course there was Mr. McCrea in a bib overall babbling about the Farmersexual photo that was questionable but took the time out of his gray matter to shake a hand.
Of course the rest of the evening went downhill from there. Three old friends not seeing each other for a long spell..I think you all know the drill.
May21, 2015
Mike let me sleep in until the crack of eight and then started pouring coffee down my gullet to wake me up. The first thing I was confronted with was the foot peg rails I brought down scabbed out of the Pamlico were total shit and he and Joel decided to put in a set of far superior ones made by Yakima back in the day. To install these fell on Joel who is a master. Feeling guilty I kept pacing around him like a caged monkey asking what I could do to help and perhaps actually learn something.

 |
| First Hole Drilled |

 |
| Joel at work |


Joel made it look mighty easy and my guess was he had them both installed in about an hour or so. If I were to attempt this I would still be working on it! Thank ye Joel! In the meantime Mike was busy with the Phase Three seat adding minicell to raise it and fit over the double keels that ran the length of the hull.
 |
| Does that look about right? |


 |
| Building up the bottom |

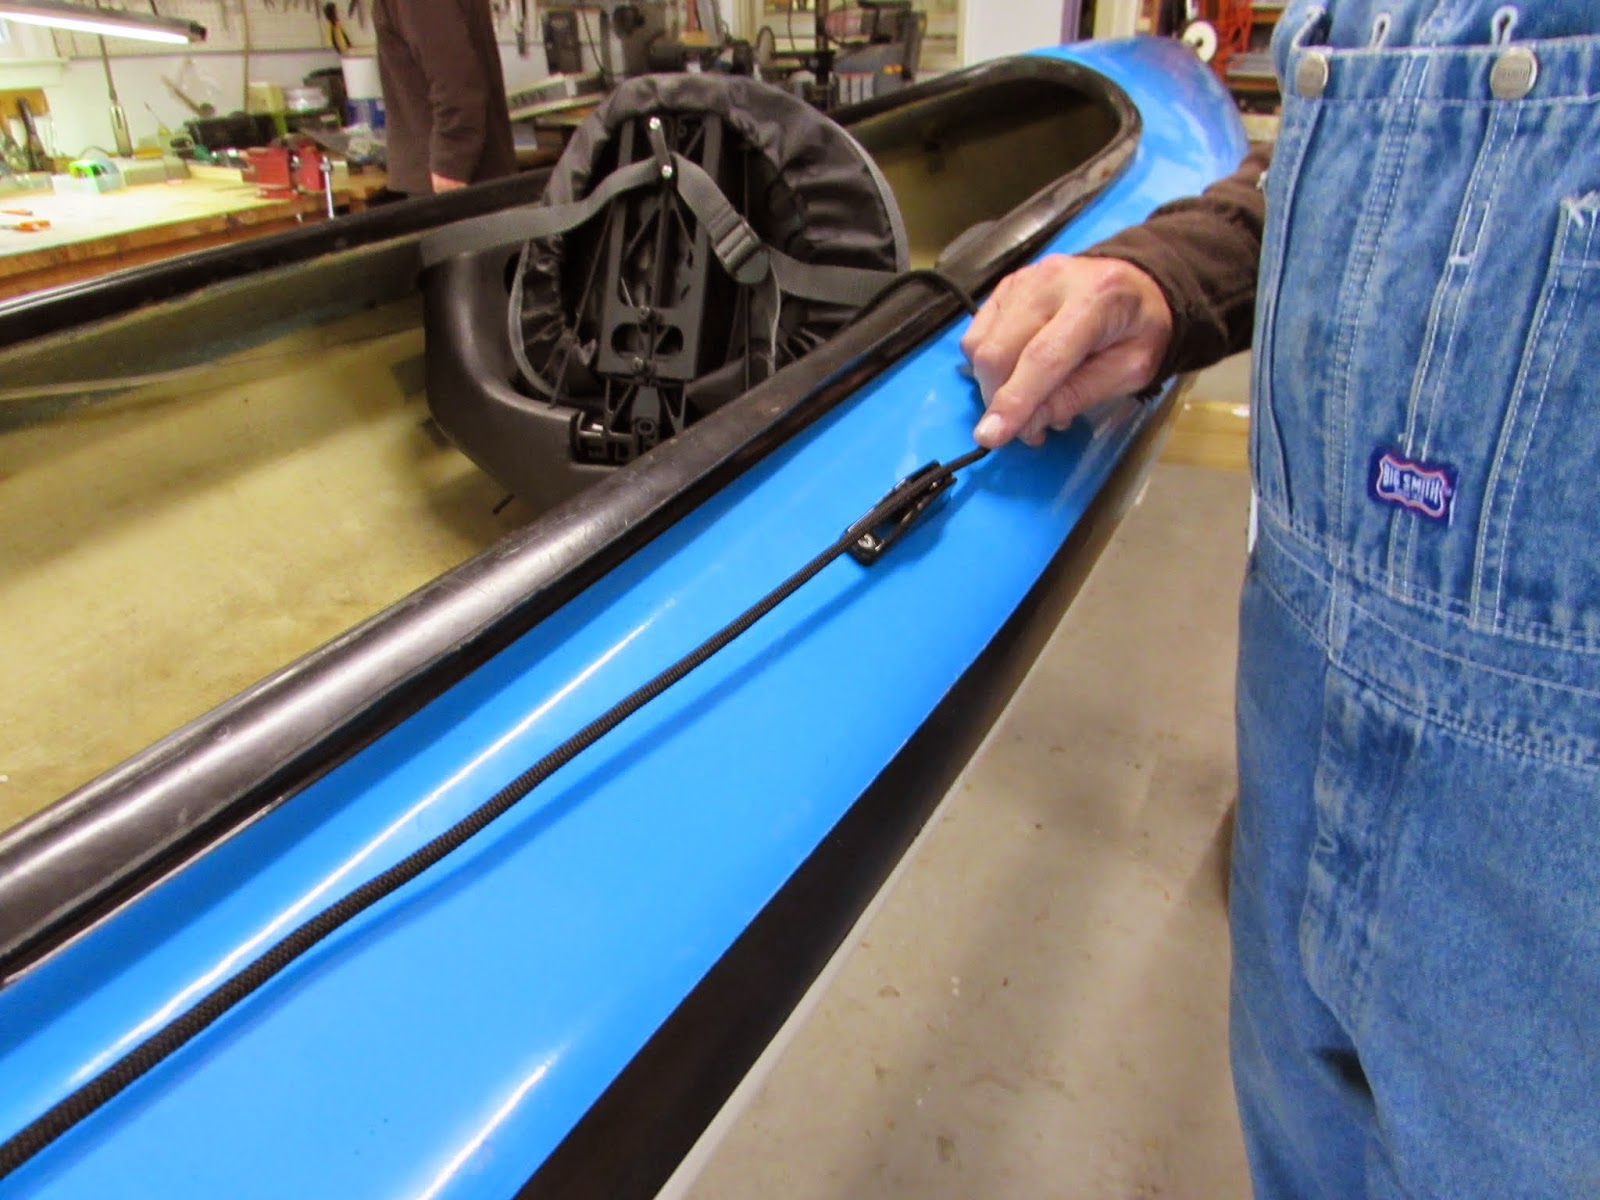
Next we needed to add a closed cleat for the rudder line so it could be raised and lowered. This was nothing more then marking and drilling holes for the cleat and then pop riveting it into place. Despite the fact that I consider this a rare find in fantastic shape I am seasoned enough to know that modifying any hull means drilling holes although the first hole did make me shake a little!

 | |
| The rudder that Mike modified |

With that done we moved on to the bow to put in padeyes and bungee for sliding paddles under. Carefully measuring and then resorting to eyeballing our measurements and some head scratching, more like how the hell did that measurement come out so far off from the other, we drilled the holes and riveted them into place.
 |
| Measure six times and then scratch head since they were off |


Next was installing some grommet straps for tie downs on the stern. Due the curve on the deck two of them required a plastic washer while the other didn't. Again, measure, scratch our heads as to how the hell the measurements came out so different, three sets of eyeballs to say it was good to go and drill and pop rivet in. With that done it was off to work up the utility thwart, a major part of this rehab.
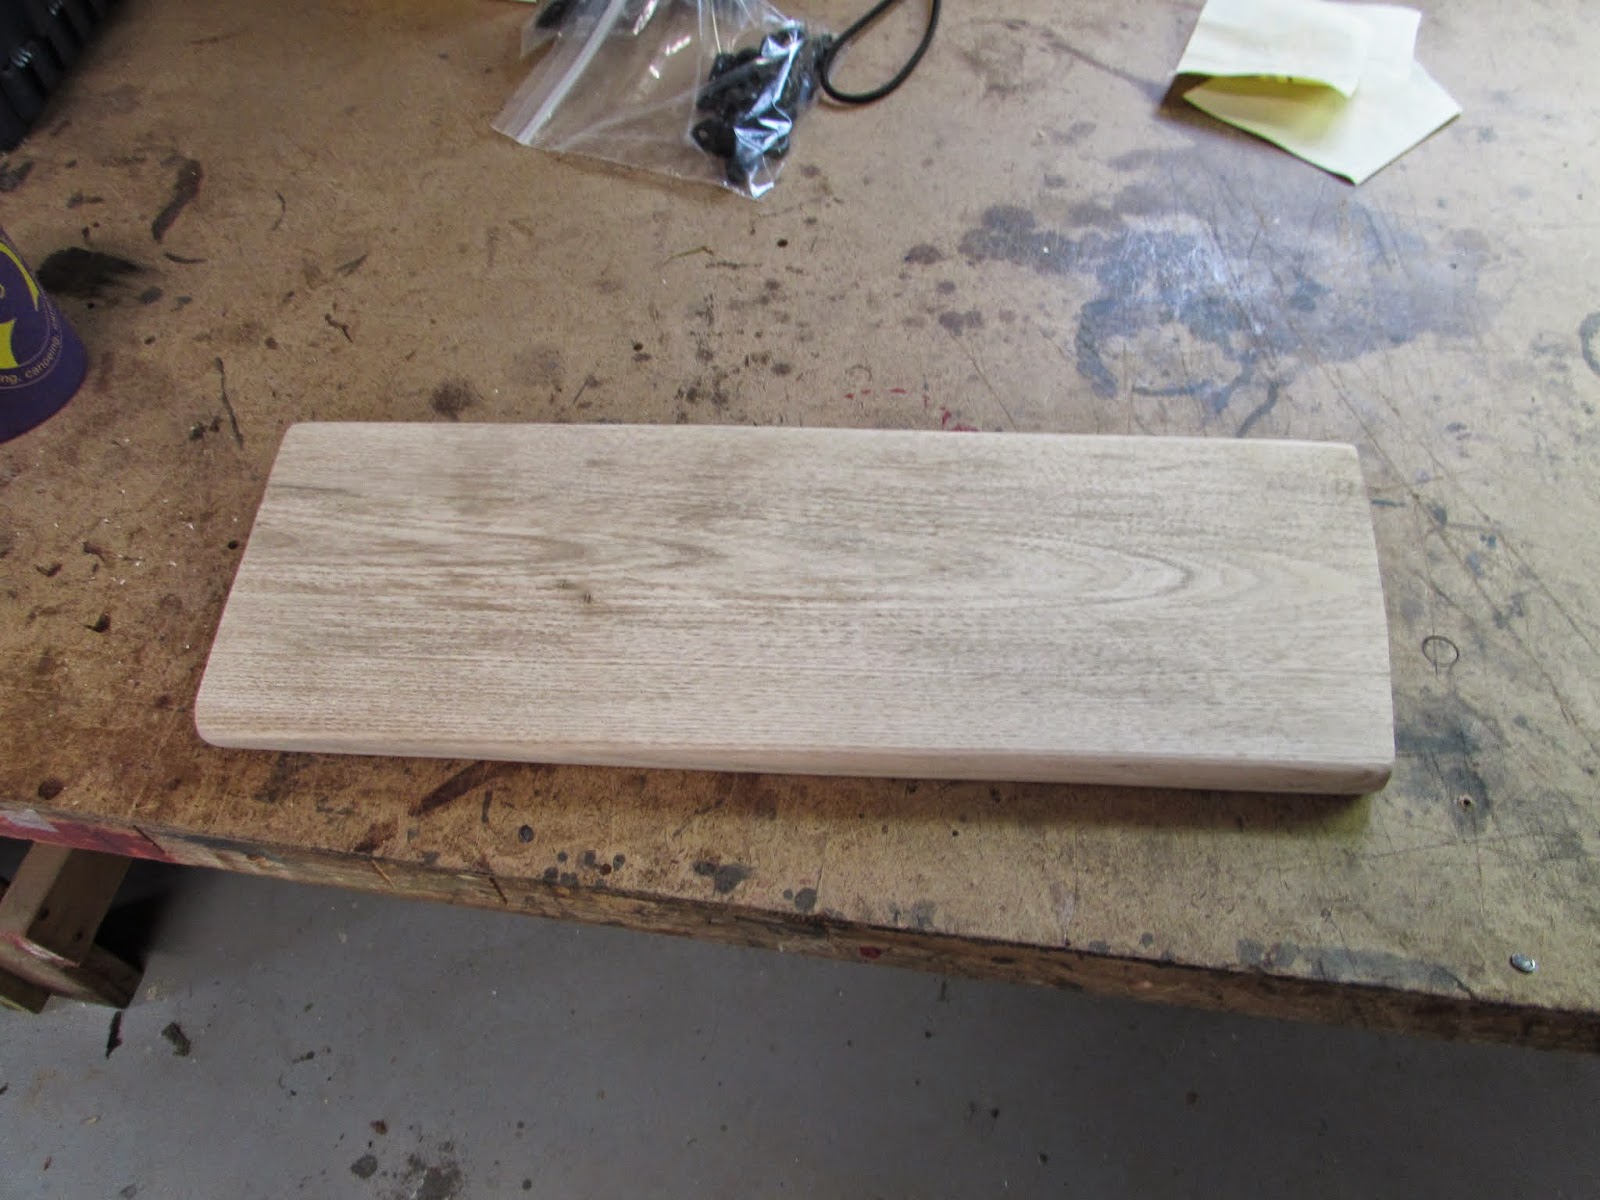
I brought a nice piece of Butternut wood as I find that to be easy to work with, repels water fairly well and just looks nice! Mr. McCrea spent a fair amount of time working it with several sanders until he got it close enough.


We added some Kevlar felt to each end that would abut the cowling. Now here's where we found one of my mistakes that turned into an advantage. The previous fall I had bought G-Flex and being somewhat smart I bought two boxes but when spring came and I was out of one set I broke out the other but it wasn't G-Flex! What the hell!!! It was G-5. Five minute epoxy. So we ended up using it to saturate the kevlar and with a mix of boxes and spare wood we got it into place. That damn stuff worked just like it said it would. In under ten minutes it was set enough for us to start playing with it. We laid in glass and resin to make a permanent bond with some peel ply on top of that. What would have taken us at least a day of waiting with regular resin or G-Flex was done in minutes. Good stuff to have in the shop!
Now that is was in place I just kind of stared at it and starting thinking how in the hell one of us...ME...was going to fit in between the thwart and the cowling to put in more hardware. More on that later.
I believe we ended the day putting the seat in but maybe that was earlier in the day. Lots of G-Flex on the bottom and then as much weight as we could find to hold it in place. We also put in my homemade D-rings both bow and aft for tie downs.
 |
| Resin and G-Flex mix |
 |
| Sandbagging the D-rings in |
 |
| Lots of weight on the seat |


Now the kicker to this day of work was adding the coveted Menacing Duckhead Sticker. I left it up to Mr. McCrea for placement. On the bow was a circle with duel arrows as an emblem. It fit in there with perfection.

Although this doesn't sound like a lot it was. What would normally take me a week took us one day and I was beat down to the ground. When I finally hit the sack I went down hard and fast. Good day one!
May 22, 2015
I was graciously allowed to sleep in late to again the crack of eight. Wiping the crustaceans out of my eyes on the way to the shop I was met by a cup of joe and the next job. No rest for the wicked or weary! The compass I bought was a nice one but the bungee off it was too long for our needs and spacing on the utility thwart. We mulled this over for a bit and decided to dissect it and make modifications.
 |
| Compass rehab |
 |
| What's this? |

Looking for the whiplash from the task master McCrea we started in on the next chore. Heel pads and knee pads on the cowling. Now for sometime I have been hearing about Dragon Skin which is used for shaping minicell. Every search I did online showed...dragon skin from some island or the movies. I had no idea what this stuff was. A metal mess that carves the foam like a hot knife on butter. But like Royalex it's not being made anymore. More to come on that. We taped out the areas for my heals and knees and then I spent time save the minicell down to shape.
 |
| Mincell Before |
 |
| And After. Dragon Skin is good stuff. |


These would be put in with contact cement which I'm not gifted with so left the actual placement to the Task Master. Perhaps someday I will get used the smell of it but if you want an instant bond this is the go to stuff.
Ok, we're making headway I thought maybe I could sit and actually have a full beer and smoke. Not to be so, crack of the whip and we are suddenly dealing with laying glass and resin for the carry handles. Do you recall my raised eyebrows at the utility thwart? Damn, I gotta get up in that tiny space to lay this stuff. After a discussion with me saying I want Dynel up there we cut out the pieces we'd need and then came the fun part. Starting on the bow end I somehow squeezed up into between the thwart and the cowling and one handed we measured out for placement. Oh Damn, my old creaky back that was broke once let me know this was not a lot of fun. I was hoping for only a couple of circus act performances but it turned into many. I do recall someone saying I grunted and groaned like a geriatric patient!
 |
| Grunt |
 |
| Groan |
For these we used the Green Peel Ply I had purchased compared to McCrea's time released Peel Ply. The difference is that with Green you have to time it or it will become permanent with the resin vs time released you can let it sit for days. So for the first time all day I was able to enjoy an actual cold beer from start to finish while waiting for the layup. Of course this becomes a PITA as you get nearer to the end time you have to keep checking it. In the end it took both hands to pry it off. The results are the same but the application of Green basically sucks. I will not buy it again nor will I throw out the almost yard and half I still have. When offered Mr. McCrea simply walked away shaking his head.


 |
| Pulling mighty hard. |


We also contact cemented some other stuff in and added some other pad eyes. I was beat. Application is easy, planning out and taping stuff off, measuring, and other things eat up time faster then you think and keeps the gray matter on double overtime. Add another gray matter to question what the hell you're doing and all of sudden it's time to stand back and scratch your chin and wonder what is wrong when there is nothing wrong!
May 23, 2015
Up and back to work by seven. First order of business was squeezing back into the bow to pull the peel ply and mark for the carry handles. Not a lot of fun but had to be done. With that done it was time to flip it open side up and start on the knee pads. Some more dragonskin work, test fit three times, mark it and then apply contact cement but of course loosing count/track so it got four coats and some extra waiting time.


With those in place and setting up we turned to the utility thwart. A relief to work on a simple task! First we measured and marked for the Spirit Sail mount followed by the paddle stays. We sat back and talked about adding J hooks for the compass but I thought the thwart was getting to crowded and opted for keeping it on the bow. If I need to I can add a couple of J hooks later. I need the space for a can of liquid courage! The final step was adding a length of bungee for holding down small items. Four holes later we were done and it was time to step back and admire the work.
 |
| Scotty in place for the sail. |
 |
| Paddle holders next. |
 |
| Bungee line for small items. |


Later in the day we took a BMO run. A great shop but it sure hurt my wallet! Dragon skin, found out it was discontinued, assorted other items and a set of paddles which maybe I didn't need but couldn't resist. Back at the McCrea abode it was time to rack the boat. Once I got home I needed to paint the thwart with another coat of resin and then black paint to tie it into the cowling. Also thought it would look pretty good to paint from the skid plates to the black seam.

More on that to come.
June 12, 2015
I really didn't need to do this step but thought it would tie in the skid plates to the seam in the hull and look pretty good. As usual prep work took three times as long as the actual work done. First thing I did was to hand draw a line/design on the hull in pencil. I will admit that my first attempt came out looking like an ass as the better half said and then I was told this, " It looks like the tip of a huge white penis with a bad circumcision job." Guess it was time to change it.

I redrew my lines and then taped some wax paper to it so I could transfer it to the other side.


Then I laid down a lot of masking tape. What is nice is the line shows through the tape! I then used a razor blade to slowly and carefully cut the line and peel off the tape on the areas I want painted.


Then it was simply painting with an exterior paint waiting about a half an hour between two coats. Wait a little bit more and then peeled off the tape. Is it perfect? No, but it is close enough and it is the bottom of the hull. Hell, I didn't even really need to do this job but I do want this relic to look as best it can.


So all I really have left to do is a little resin work where I had to cut out some resin and cloth and she will be good to go. After a recent paddle with a friend, who took it for a spin, he came back to shore and declared it was like riding in a Cadillac! I do believe that will be the new moniker for this old and distinguished hull.
No comments:
Post a Comment